Continuous Integration for Verification of Simulink Models Using GitLab
By Jemima Pulipati, Anand Vaidyanathan Sarma, and David Boissy, MathWorks
If you are using R2022a or later and have a Simulink Check™ license, you can streamline your CI integration by using the CI Support Package for Simulink®. With the support package, you can define a process model for your team and set up your CI system to automatically run the tasks in your process as a pipeline in CI. The support package includes support for several CI platforms so that you can automatically generate pipelines specific to your project and process, removing the need for manual updates.
Key Features:
- Built-In Tasks: Automate common tasks in your model-based development and verification workflow by using built-in tasks for activities such as checking modeling standards with Model Advisor, running tests with Simulink Test™, and generating code with Embedded Coder®. Instead of managing various scripts for your development and verification activities, you can reconfigure and use these built-in tasks for consistent execution and organized task results.
- Incremental Builds: Identify the impact of a change to your project and automatically rerun only the impacted tasks to help improve build efficiency. The Process Advisor app and its build system can rerun tasks with outdated results and automatically skip tasks that are up-to-date.
- Automatic Pipeline Generation: Use the support package’s template file to automatically generate pipelines, so that you do not need to manually update CI/CD configuration files when you make changes to your project or process. You can easily customize the settings of the pipeline generator to separate your tasks into different jobs, run model tasks in parallel, and change other pipeline behaviors.
For more information, see Continuous Integration and Integrate Process into GitLab.
This is the second article in a two-part series. Part 1, Continuous Integration for Verification of Simulink Models, looks at leveraging GitLab® for version control and Jenkins® for continuous integration (CI). This article uses GitLab for both version control and CI.
The project used in this example is available on GitHub® and File Exchange for download.
Continuous Integration (CI) Workflow
Continuous integration (CI) is an agile methodology best practice in which developers regularly submit and merge their source code changes into a central repository. These “change sets” are then automatically built, qualified, and released. Figure 1 illustrates this basic CI workflow together with the development workflow.

Figure 1. CI Workflow.
Case Study: A Simulink Model Verified, Built, and Tested Within GitLab
In this example, we use Model-Based Design with CI to perform requirements-based testing on a cruise control system (Figure 2).

Figure 2. A cruise control system.
CI Pipeline
CI pipelines are explained in the technical article, Continuous Integration for Verification of Simulink Models. We will apply these same concepts to define a pipeline in GitLab. Each time changes are pushed to the GitLab repository, our CI pipeline is executed. The pipeline is illustrated in Figure 3.

Figure 3. The pipeline for a cruise control system.
The phases in this example pipeline are as follows:
- Verify Modeling Guidelines: Run a MATLAB® script to verify modeling guidelines with Model Advisor using ISO® 26262 checks and generate an HTML report.
- Generate Code: Use a MATLAB script to build the model and generate a corresponding build report.
- Execute Test Cases: Execute unit tests on a specified model and generate corresponding reports.
- Package Artifacts: Generate a summary report with information related to previous stages.
- Deploy: Download all the artifacts from previous stages to the artifacts path specified in the pipeline.
Workflow Steps
The workflow consists of the following steps (Figure 4):
- Trigger a pipeline in GitLab and observe that the Verify and Build stages pass.
- Detect a test case failure in the GitLab CI pipeline and create an issue to track and discuss the bug fix.
- Reproduce the issue in MATLAB for desktop.
- Fix the issue in the model.
- Test locally to ensure the test case passes.
- Review the changes on the testing branch.
- Commit the change to Git™ and trigger the CI pipeline in GitLab.
- Verify, build, and test in GitLab.
- Create a merge request to merge the changes of the test branch into the main branch and close the corresponding Issue.

Figure 4. An example CI workflow.
Our first failed pass through the CI loop is illustrated at the top left of Figure 4. It shows the CI test failure, local reproduction, criteria relaxing, and successful completion of the CI workflow.
Workflow Details
1. We begin by triggering the pipeline in GitLab by pushing the changes from MATLAB to GitLab. The model standards checks and code generation pass.

The status of the pipeline can be seen on the project’s homepage. The status of the jobs in the pipeline can be seen by clicking on that icon. The red symbol indicates that the pipeline has failed.

Below is the parent-child pipeline showing a failure for the triggered commit. The corresponding child pipeline can be expanded under Downstream in the second column.

2. Next, we detect a failure inside the pipeline of TargetSpeedThrottle. The child pipeline TargetSpeedThrottle has failed. This failed pipeline can be viewed by clicking on it.

Since the Testing stage failed, the other stages are not executed. The console output can be viewed by clicking on the failed job.

Upon observing the output, we can say that the opMode Increment unit test case has failed. A new issue can be created by clicking on the New Issue button on the right side. The description and other fields can be entered using this form, which creates a new issue for the repository.

The created issue appears below, and #1 is the corresponding issue number.

3. To understand the failure better, we reproduce the failure locally using Simulink Test. Open the test file TargetSpeedThrottleTestManager.mldatax located in the Design/TargetSpeedThrottle/pipeline/tests/collection folder and run test case opMode Increment. In the test suite, we can see that Verify Statements had failed for the opMode Increment unit test as shown.

4. To fix the issue, open the Design/TargetSpeedThrottle/specification/TargetSpeedThrottle.slx model and navigate to the Test Assessments block within the test harness TargetSpeedThrottle_Harness as shown.


The assessment asserts that the difference between throtCC and exp_throtCC is less than 0.1% as shown.

This assessment is too restrictive for checking the difference to be less than 0.1%. This value must be changed to 0.005 to fix the test.

5. The issue appears fixed in our simulation. To confirm, we test locally, saving the model and rerunning the test in the test manager. Notice that it passes with the new assessment criteria.

6. We have fixed the issue and verified the fix locally. We now use the Model Comparison tool to review the changes before committing them to version control.

We could also use the Publish feature of the Model Comparison tool to review the code.

7. With the bug fixed, we commit these changes and push them to the remote repository on GitLab with MATLAB projects, adding a commit message to note the change to the assessment criteria.

Commit messages can be written using specific phrases to close issues automatically. Here, the commit message Fixes #1 will automatically close the issue that was created when the pipeline failed when the most recent CI pipeline passes.
We then note the latest commit in the GitLab repository.

8. The GitLab CI pipeline runs. We see that the Verify, Build, and Test pipeline phases now pass.
9. We can now start a merge request to merge the changes in the test branch into the main branch. In GitLab, under Repository, we can select Branches, then click Merge request next to the latest commit on the test branch, or use the Create merge request button that appears at the top of the repository page.

We complete the form and submit the merge request.
As the owners of the branch, we can accept the merge request by clicking the Merge button. Depending on our CI setup, we can also enable automatic merge after the CI pipeline has passed. All changes are now captured on the main branch, and the pipeline automatically starts running on the main branch.

After the pipeline execution, the corresponding issue automatically gets closed.

After the execution of the Verify, Build, and Test stages in the pipeline, a summary report is generated in the Package stage for every model.

Using the Example: Tools, Resources, and Requirements
The project used in this example is available for download. The sections below outline resources to help you get started, as well as the tools you will require and how they should be configured. The sections below outline resources to help you get started, as well as the tools you will require and how they should be configured.
Configuring Systems
GitLab is used as the version control system and CI system. MATLAB and GitLab must be configured together. The following tutorials will help with setup:
Configure MATLAB Project and GitLab
Explanation of Pipelines and Artifacts
Tools Required
- GitLab account. GitLab is used for source control and CI and is available as a cloud service. MATLAB projects include a Git interface for communication with GitLab.
License Considerations for CI
If you plan to perform CI on many hosts or on the cloud, contact MathWorks (continuous-integration@mathworks.com) for help. Note: Transformational products such as MATLAB and Simulink® coder and compiler products may require client access licenses (CAL).
Appendix 1: Configuring a MATLAB Project and GitLab
Step 1. Configure a MATLAB project to Use Source Control
The first step in our example is to configure our project to use source control with GitLab.
- Create a new directory named
MBDExampleWithGitLab, load the example into it, and open the MATLAB projectMBDExampleWithGitLab.prj. - In GitLab, create a new project that will be the remote repository. Name it
MBDExampleWithGitLaband make a note of the URL where it is hosted. - In MATLAB, convert the project to use source control. On the Project tab, click Use Source Control.

Click Add Project to Source Control.

4. Click Convert.
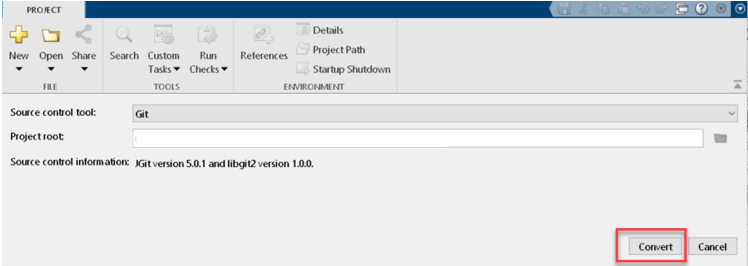
5. Click Open Project when done.

The project is now under local Git source control.
Step 2. Set Up GitLab Runner
GitLab Runner is an application that works with GitLab CI/CD to run jobs in a pipeline. A GitLab Runner must be installed, registered, and started to execute the pipeline.
To install, register, and start the GitLab Runner corresponding to your operating system, refer to the steps mentioned here (the optional concurrent value in config.toml can be given as “8” for this example). Refer to the points below before proceeding with the registration of the runner in the above link.
- A GitLab repository can use a specific runner for a single project. To create and register a specific runner for the project, follow the steps mentioned in the requirements and corresponding to the operating system being used. The tags entered during registration will help identify which runner to allocate to which repository in GitLab. In this example, the tags should be given as
testcisince the .yml files (used for pipeline definition in the current example) have the tags astestci. While mentioning the executor during registration, a “shell” can be used. This means that a shell environment will be used by the pipeline during execution. - Upon successful registration of the runner, a message will be displayed that looks something like this:

Step 3. GitLab Personal Access Token
Create a personal access token for the GitLab Repository. It is important to make a note of the generated personal access token since it can only be viewed once. Create a CI/CD pipeline variable for this personal access token (Key refers to the variable name and Value is the actual token). This variable name entered in the Key field will be used as a parameter for the job artifacts API used in the pipeline definition, so make a note of it. (To run this example, mention Key as CIPROJECTTOKEN.)
Step 4. Configure the Pipelines
1. Mention the runner relevant tags in .yml files The .yml files in the project folder describe the different phases of the CI pipeline. The .gitlab-ci.yml file refers to the main pipeline that is triggered when code is pushed into the repository. The files .driverSwRequest-gitlab-ci.yml, .cruiseControlMode-gitlab-ci.yml, .targetSpeedThrottle-gitlab-ci.yml, and .crs_controller-gitlab-ci.yml refer to the child pipelines for the models and get triggered only if a specific model is changed or gitlab-ci.yml is changed. Open the .yml files and change the tags field to testci—similar to Step 2 of the GitLab Runner setup. An example is shown below:

2. Modify the artifacts path.
Verify and modify the ARTIFACTS_DOWNLOAD_PATH variable in .gitlab-ci.yml. The artifacts are downloaded in the Deploy stage of the child pipeline using the jobs artifacts API. This variable value is used for placing the downloaded artifacts path.

3. Specify the personal access token for the job artifacts API.
Each of the child pipelines .yml files (.driverSwRequest-gitlab-ci.yml, .cruiseControlMode-gitlab-ci.yml, .targetSpeedThrottle-gitlab-ci.yml and .crs_controller-gitlab-ci.yml) have a Deploy stage defined in them which uses the job artifacts API to download the artifacts of the entire child pipeline. This example uses PRIVATE-TOKEN: $CIPROJECTTOKEN in the API request. Replace CIPROJECTTOKEN with the Key field name used in Step 3 of configuring GitLab.

Step 5. Commit Changes and Push Local Repository to GitLab
1. On the Project tab, click Remote.

2. Specify the URL of the remote origin in GitLab. This is the URL where the GitLab repository is hosted.

Click Validate to ensure the connection to the remote repository is successful and click OK. The project is now configured to push and pull changes with GitLab.
3. Click Commit to perform an initial commit.


4. Click Push to push all changes from the local repository to the remote GitLab repository.

5. Refresh the GitLab dashboard and observe the contents of the MATLAB project.

Since the GitLab Runner was set up in the previous steps, the pipeline starts running as soon as changes are pushed to the repository. The .gitlab-ci.yml file is responsible for starting the pipeline.
Step 6. Create the Testing Branch
In this step, we create a testing branch for testing and verifying changes before merging with the main branch.
1. Click Branches.

Expand the Branch and Tag Creation section, name the branch Test, and click Create.

2. Now observe Test in the branch browser. From the Test branch, click Switch, then Close.

3. Push the changes to Test branch. In MATLAB, select Push to push these changes to GitLab and observe the Test branch in GitLab.

Appendix 2: Explanation of Pipelines and Artifacts
1. Parent-Child Pipeline
This example uses a parent-child pipeline structure.

There is a main parent pipeline comprising child pipelines (shown in the first column in above picture). There are four triggers (shown as four jobs under the stage Downstream) to indicate the four child pipelines. Each child pipeline is used for each model of the system whose progress can also be viewed by expanding it in Downstream.


The child pipeline shown above displays the stages for the CruiseControlMode model in the system.
2. Stages in Child Pipeline
- Verify: The modeling standards for ISO 26262 are verified here using Simulink Check.
- Build: This performs the code generation on the model.
- Testing: This executes the unit tests written for the model.
- Package: A final stage to show the artifacts generated and the pipeline has been successful.
- Deploy: A placeholder stage to include any deployments of code. All the artifacts of the pipeline are downloaded using job artifacts API.
3. YAML Keywords
This pipeline structure and the job definition must be created inside the .yml files, which are used by the runner to execute the pipelines. A .gitlab-ci.yml holds the configuration details of the stages and jobs of a CI/CD pipeline for any project. The following steps explain the .yml files used to construct the parent-child pipeline described in the previous steps (the example used in this article has all the necessary .yml files to execute the pipeline, but the following steps briefly describe the contents of the .yml files).
a. Initially the stages of the parent pipeline are mentioned in the .gitlab-ci.yml.

b. The keyword trigger corresponds to the child pipelines. Since there are four models, four different jobs must be written. Here is an example of one of them:

Every job starts with a unique job name followed by the stage it belongs to. Since this calls another child pipeline, the .yml file of the child is mentioned using the keyword include. The strategy keyword means that the next job will not be executed until this one is completed. The rule keyword indicates that the child pipeline has to be triggered only when the user makes a change in the folder paths that are mentioned in lines 2225.
c. Each of the four child pipelines have their corresponding .yml files. They will also include a declaration of stages and the jobs under each stage of the child pipeline. Here is an example of one of the jobs in a child pipeline.

The tags refer to the tags given during the registration of the runner. Any files/commands to execute are mentioned under script. The artifacts are the files that are required to be saved before passing onto the next job. Usually, any files that are generated during the job execution and that are helpful to the user later while verifying the results are stored as an artifact. Here, the reports/results generated in the analyze folder of the model and the logs are saved as artifacts. The other jobs of the parent pipeline can also be described similarly in the gitlab-ci.yml file.
d. The artifacts are downloaded in the Deploy stage using the job artifacts API. Here CIPROJECTTOKEN refers to the CI/CD variable created for the personal access token previously. ARTIFACTS_DOWNLOAD_PATH was defined as a variable in .gitlab-ci.yml. Note that the artifacts can also be browsed/downloaded even from the individual job page mentioned in the later steps.

4. Artifacts
a. The pipeline can be viewed from the repository’s page.

The green symbol indicates that the pipeline has run and is successful.
b. On clicking that symbol, we can see the successful jobs in that pipeline.

Each job’s progress can be viewed by clicking on it.

This is the console where any output statements are printed. Also, the artifacts for the job can be viewed from the section on the right side where the artifacts can be browsed or downloaded. Every stage in a child pipeline generates artifacts until the Deploy stage.
c. Every child pipeline’s test result can also be viewed under the Tests tab inside every child pipeline job.

d. Any reports/results files generated while executing the jobs get stored in the analyze folder under each model. Apart from these, there is a summary report that is created at the end of each child pipeline (in the Package stage), which has all the results from the previous stages of the child pipeline.
Here is an example of a summary report for the DriverSwRequest model:

This report is present in the /analyze/package folder of every model with the model’s name followed by SummaryReport. The user can download these reports as an artifact from the Package stage of each child pipeline.
If any stage (before Package) of the child pipeline fails, then the summary report cannot be generated, as this happens only in the Package stage. And once a stage fails, the control does not go to the next stage.
5. Child Pipeline—Job Artifacts in Each Stage
The Cruise Control Project generates the following artifacts in the stages:
- Verify: Model Advisor results report
- Build: A build report, Codegen folder
- Testing: Test report
- Package: All the reports in the analyze folder
- Deploy: All the artifacts of previous stages
How to Check If the Pipeline Executed Correctly
- The summary reports generated in the artifacts are a good starting point to verify the statistics of the results of all the stages.
- All the jobs in the pipeline must pass. If MATLAB throws an error, then the pipeline job would fail because of the exit status code that MATLAB throws.
For any issues with the error message “error setting certificate verify locations” while running the GitLab pipeline, refer to the following:
Published 2024