Deployment on Unsupported PX4 Autopilots from Simulink
R2026bIf your PX4®-compatible autopilot board does not appear in the hardware setup dropdown, use this process to provide a custom CMake build target and deploy Simulink®-generated code to that board. For the list of boards that are directly supported, see Supported PX4 Autopilots.
This topic uses Cube Orange to demonstrate the process. Although Cube Orange is a supported board, the steps shown here apply to any unlisted board when you substitute your board's CMake build target. For direct Cube Orange deployment instructions, see Deployment on Cube Orange Autopilot from Simulink.
Before starting with Simulink, ensure that you install QGroundControl version 4.3.0 and can upload the latest stable version of PX4 firmware from QGroundControl. If you face an issue with USB connection, install Mission Planner and do a clean reinstallation of the latest drivers as described in this page.
After you upload the PX4 firmware from QGroundControl, get started with UAV Toolbox Support Package for PX4 Autopilots.
Select Custom PX4 Autopilot Hardware Setup
If the support package is already installed, start the hardware setup by opening the Add-On Manager.

In the Add-On Manager, start the hardware setup process by clicking the Setup button,
 .
.After starting, the Hardware Setup window provides instructions for configuring the support package to work with your hardware.
In the Select a PX4 Autopilot and Build Target page, select
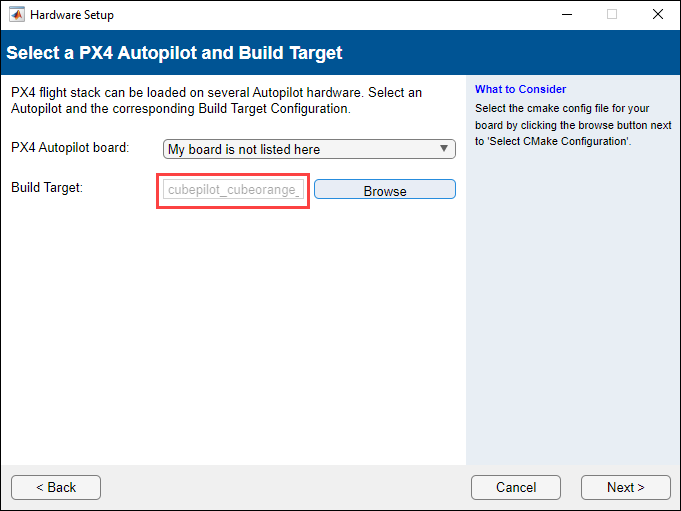
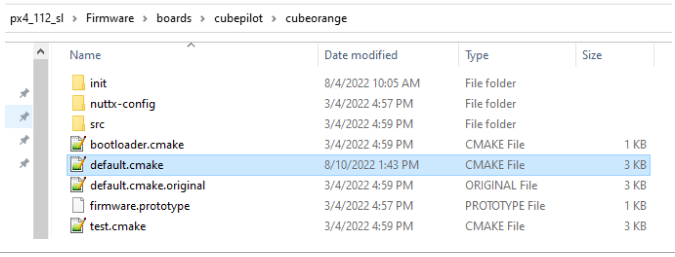
PX4 Generic Boardand browse to the CMake build target for your board (for example,cubepilot_cubeorange_defaultfor Cube Orange) in your PX4 firmware folder. Click Next to go to the Build PX4 Firmware page.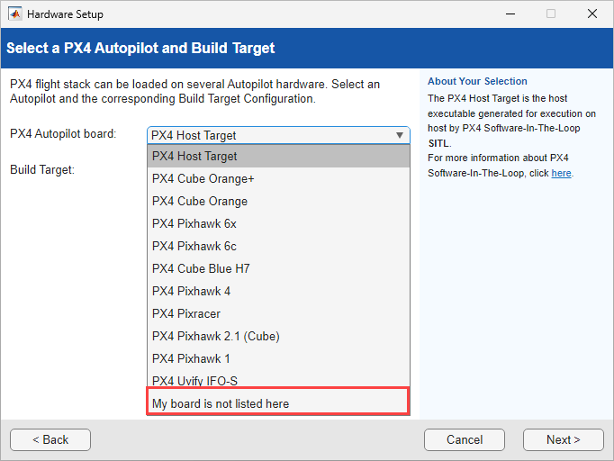
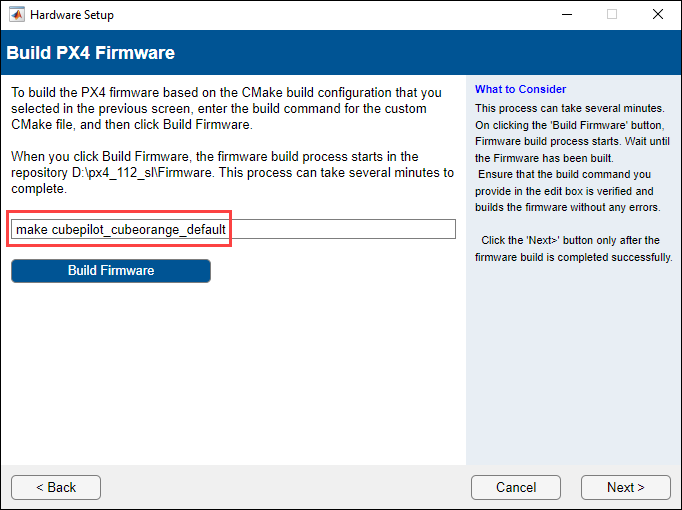
On the Build PX4 Firmware page, build the firmware by clicking Build Firmware.
In the Test Connection hardware setup page, if your board is already connected, the serial port fields are automatically populated with the detected COM ports. If you connect the board after this page loads, click Refresh to detect and populate the correct COM ports. Click Upload Firmware to upload the firmware, then click Get Accelerometer Data to confirm that the hardware is ready for use with Simulink.
Note
If automatic COM port detection does not work for your board, see Set COM Port for Upload and Communication in Simulink.
Select PX4 Generic Board as the Simulink Target Hardware
In Simulink, open the Hardware Settings.

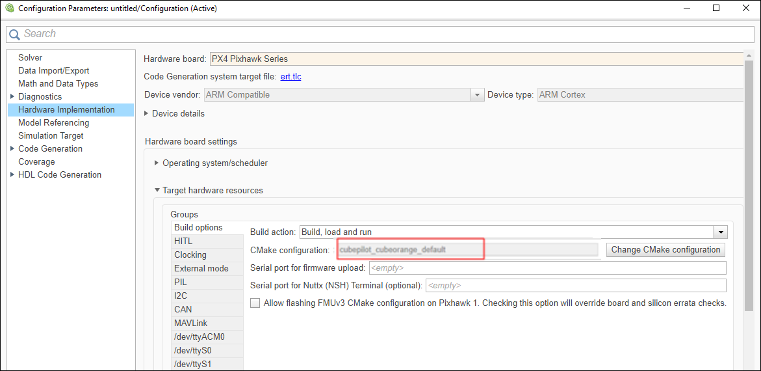
In the hardware settings, on the Hardware Implementation tab, select PX4 Generic Board as the hardware board. The selected CMake build target in hardware setup automatically appears in CMake configuration.
Troubleshooting
If automatic port detection does not work, see Set COM Port for Upload and Communication in Simulink.

