Visually Organize Models Using Area Annotations
You can add area annotations to your model to visually group related model elements.
Areas have these properties:
You can label an area.
All model elements inside an area, including the label, move with the area and maintain their spatial relationship as they move.
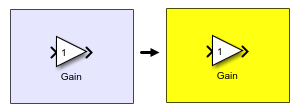
Areas have a solid background color.
Tip
If you want to want to use an image as a background for a set of model elements, use an image annotation. For more information about image annotations, see Create Image Annotations.
Unlike model elements inside an area, model elements on top of an image annotation do not move with the annotation. If you want a background image and the ability to move the model elements together with the image, consider adding both the elements and an image annotation to an area.
You can convert part of an existing block diagram to an area, or you can add a blank area to your model and insert model elements.
To convert part of an existing block diagram to an area:
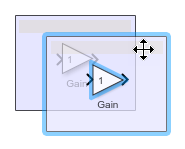
In the model canvas, drag a selection box over the model elements that you want to include in the area. An ellipsis (…) appears next to the selection box.
Pause on the ellipsis. An action bar expands.
In the action bar, click Create Area.
If you want to give the area a label, type the label. The label appears in the upper left of the area.
To add a blank area:
In the model canvas, click and drag over a blank area to draw the area shape. An ellipsis (…) appears next to the selection box.
Pause on the ellipsis. An action bar expands.
From the action bar, click Area.
If you want to give the area a label, type the label. The label appears in the upper left of the area.
To delete an area and all its contents, drag a selection box over the area and press Delete. To only delete the area and keep the contents, check that nothing is selected, then click the area and press Delete.
To add a model element to an area, either drag the element into the bounds of the area. Alternatively, expand the area to encompass the element by clicking and dragging the corners of the area outward.

To move an area, pause on one of the edges of the area. When the gray bar appears, click and drag the area to the new position.
To move an area without moving its contents, press Alt while you click and drag the area. On macOS, press Option instead.

To change the label text of an area, select the area, click the ? in the upper left corner, and type the new label text.

To create a copy of an area, press Ctrl while you click and drag the area. The contents of the area will also copy.
To change to color of an area, in the Simulink® Toolstrip, on the Format tab, in the
Style section, click Foreground. You can select a
color from the menu or click Custom Color ![]() to define your own color.
to define your own color.