Main Content

Use Git in MATLAB

You can use Git™ source control in MATLAB® to manage your files and collaborate with others. Using Git, you can track changes to your files and recall specific versions later. From the MATLAB Current Folder browser, you can clone an existing remote repository, add files to the local repository, commit changes, and push and pull changes to and from the remote repository.
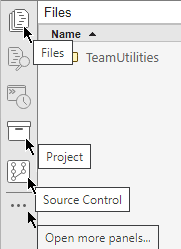
Once you have cloned a remote Git repository, the basic workflow for working with the remote repository is:

  1. Pull the latest changes from the remote repository.

  2. Edit existing files in your working folder.

  3. Mark new files for addition to the local repository.

  4. Review the changes.

  5. Commit modified files to the local repository.

  6. Push changes to the remote repository.

Basic Git workflow

Alternatively, to track changes to your files without sharing with others, you can create a local Git repository that is not synced with a remote repository. The same basic workflow applies when working with a local repository that is not synced with a remote repository, except for the omission of the Pull and Push actions.

Note

Before using Git in MATLAB, to setup your system and avoid file corruption, follow the steps described in Set Up Git Source Control.

Clone Remote Git Repository

You can clone a remote Git repository (for example, from GitHub® or GitLab®) using HTTPS or SSH.

To clone a remote Git repository:

  1. In the Current Folder browser, right-click the white space and select Source Control > Manage Files. MATLAB opens the Manage Files Using Source Control dialog box.

  2. Set the Source control integration option to Git.

  3. Click the Change button next to the Repository path field. MATLAB opens the Select a Repository dialog box.

  4. Enter the path to the remote repository.

  5. Click the Validate button to check the remote repository path. If prompted, enter the login information for the remote repository (for example, your GitHub user name and personal access token). If the path is valid, click OK to select the remote repository and return to the Manage Files Using Source Control dialog box.

  6. In the Sandbox field, enter the path of the working folder in which to store the retrieved files. The specified folder must be empty.

  7. Click the Retrieve button. If prompted, enter the login information for the remote repository.

After cloning a remote repository, to change the path to the remote repository, right-click in the working folder, select Source Control > Remote, and specify the new path.

To prevent frequent login prompts when you interact with your remote repository using HTTPS, configure a Git credential manager to remember credentials. For more information, see Install Git Credential Helper. Alternatively, you can add a new public key and clone the remote repository using SSH instead. For more information, see Configure MATLAB to Use Git SSH Authentication.

You also can clone a remote repository into a new project. For more information, see Clone Remote Git Repository into New Project.

Mark Files for Addition

To add the files in your working folder to source control, mark them for addition. MATLAB indicates files that have not been added to source control using the Not Under Source Control icon () in the Git column of the Current Folder browser.

To mark a file for addition, right-click the file in the Current Folder browser and select Source Control > Add to Git. MATLAB indicates the file is marked for addition using the Added icon ().

Current Folder browser showing two files. The Git column displays the Not Under Source Control icon next to the first file and the Added icon next to the second file.

Review Changes

When you make changes to a file in your working folder, MATLAB indicates that the file is modified using the Modified icon () in the Git column of the Current Folder browser. The Unmodified icon () indicates that a file has no changes.

Current Folder browser showing two files. The Git column displays the Modified icon next to the first file and the Unmodified icon next to the second file.

Before committing a modified file, review the changes to the file using one of the methods described in this table:

ActionProcedure

Compare the changed file to the latest revision of the file in your local repository.

Right-click the file in the Current Folder browser and select Source Control > Compare to Ancestor. The Comparison Tool displays the differences.

Compare the changed file to a revision of the file in your local repository.

Right-click the file in the Current Folder browser and select Source Control > Compare to Revision. Then, select a revision to compare the modified file to and click the Compare to Local button. The Comparison Tool displays the differences.

Compare two previous revisions of a file in your local repository.

Right-click the file in the Current Folder browser and select Source Control > Compare to Revision. Then, select the two revisions to compare and click the Compare Selected button. The Comparison Tool displays the differences.

Browse the revisions for a file in the local repository.

Right-click the file in the Current Folder browser and select Source Control > Show Revisions. You can view information about who previously committed the file, when they committed it, the log messages, and the list of files in each change set. You can select multiple files and view revision history for each file.

Commit Modified Files

To record and save the current state of new and modified files in your working folder, commit them to your local repository.

To commit files to your local repository:

  1. In the Current Folder browser, right-click and select Source Control > View and Commit Changes. The View and Commit Changes dialog box opens.

  2. Select the files to commit.

  3. Enter a comment in the Comment section.

  4. Click the Commit button.

If the remote repository has moved ahead, you are prompted to update the revision of your files. To update the revision, right-click in the Current Folder browser and select Source Control > Pull. Resolve any conflicts before you commit.

Push Files

If your local repository contains committed changes that are not in your remote repository, you can push those changes to your remote repository. To check whether your local repository contains changes that are not in your remote repository, right-click in the Current Folder browser and select Source Control > View Details. The Git information field indicates whether your committed local changes are ahead of, behind, or coincident with the remote repository.

If your local repository is ahead of your remote repository, to push the changes, right-click in the Current Folder browser and select Source Control > Push. A message appears if you cannot push your changes directly because the repository has moved on. To continue, pull the latest changes from the remote repository into your local repository.

Git does not support empty folders in remote repositories. Therefore, if you create an empty folder in MATLAB and push the changes to the remote repository, when you clone the remote repository into a new local repository, the empty folder is not included. To push empty folders to the remote repository for other users to use, create an empty gitignore file in the folder and then push your changes.

Pull Files

If your remote repository has moved on and your local repository is behind, you can pull the latest changes into your local repository. To pull the latest changes, in the Current Folder browser, right-click and select Source Control > Pull. Pull might fail if you have conflicts. With a complicated change, consider creating a branch from the origin (local repository), making some changes, and then merging that branch into the main tracking branch.

A pull action fetches the latest changes and merges them into your current branch. If you are not sure what is going to come in from the repository, fetch the files first to examine the changes and then merge the changes manually.

Fetch Files

To fetch the latest changes from your remote repository, in the Current Folder browser, right-click and select Source Control > Fetch. Fetch updates all of the origin branches into your local repository. Your working folder files do not change. To see the changes from the remote repository, you must merge in the origin changes to your local branches.

To check whether your local repository contains fetched changes that need to be merged, right-click in the Current Folder browser and select Source Control > View Details. The Git information field indicates whether your committed local changes are ahead of, behind, or coincident with the remote repository. If your committed local changes are behind, you need to fetch and merge in the latest changes from the remote repository.

For example, if you are on the main branch, get all changes from the main branch in the remote repository.

  1. Right-click in the Current Folder browser and select Source Control > Fetch.

  2. Right-click in the Current Folder browser and select Source Control > Branches.

  3. In the Branches dialog box, select origin/main in the Branches list.

  4. Click Merge. The origin branch changes merge into the main branch in your working folder.

To check whether the merge was successful, right-click in the Current Folder browser and select Source Control > View Details. If the Git information field indicates Coincident with /origin/main, the changes were merged successfully, and you can now view the changes that you fetched and merged from the remote repository in your working folder.

Resolve Conflicts

If you and another user change the same file in different working folders or on different branches, a conflict message appears when you try to commit your modified files. To resolve the conflict, compare the differences causing the conflict and then merge or overwrite the conflicting changes. After resolving the conflict, you can mark it resolved and commit the file.

MATLAB indicates conflicts in the Git column of the Current Folder browser with a red warning icon (). To resolve conflicts in a file:

  1. Right-click the conflicted file and select Source Control > View Conflicts. The Comparison Tool opens and shows the differences between the two conflicting revisions of the file.

  2. Use the Comparison Tool to determine how to resolve the conflicts. To merge changes between the two revisions, see Compare Files and Folders and Merge Files.

  3. After you have resolved the conflicts, in the Current Folder browser, right-click the file and select Source Control > Mark Conflict Resolved.

  4. Commit the modified files.

Extract Conflict Markers

If you are working with files that are not registered as binary (text files, for example), Git might insert conflict markers into those files. Conflict markers have this format:

<<<<<<<["mine" file descriptor]
["mine" file content]
=======
["theirs" file content]
<<<<<<<["theirs" file descriptor]
You can use MATLAB to extract the conflict markers from a file before resolving the conflicts.

When you open a conflicted file or select View Conflicts, MATLAB checks the file for conflict markers. If the file contains conflict markers, the Conflict Marker Found dialog box opens. Follow the prompts to extract the conflict markers and fix the file.

To view the conflict markers, in the Conflict Markers Found dialog box, click Load File. Do not try to open the file because MATLAB does not recognize conflict markers. Instead, click Fix File to extract the conflict markers.

Files that do not have a conflict can still contain conflict markers. This situation can happen if a file with conflicts is marked as resolved and committed to the local repository. If you see conflict markers in a file that is not marked conflicted, you can extract the conflict markers manually.

  1. In the Current Folder browser, right-click the file and select Source Control > Extract Conflict Markers to File.

  2. In the Extract Conflict Markers to File dialog box, ensure that the default option to copy "mine" file version over the conflicted file and the Compare extracted files option are selected.

  3. Click Extract.

  4. Use the Comparison Tool to resolve any conflicts.

Manage Files

There are several actions that you can take to manage the files in your local Git repository from the Current Folder browser. You can refresh the source control status of your files, as well as move, rename, delete, and revert the files.

This table describes the actions that you can take to manage your files.

ActionProcedure
Refresh source control status of one or more files

In the Current Folder browser, select one or more files, right-click and select Source Control > Refresh Git status.

Refresh source control status of all files in local repository

In the Current Folder browser, right-click the white space and select Source Control > Refresh Git status.

Move file

In the Current Folder browser, right-click the file, select Source Control > Move, and enter a new file location.

Rename file

In the Current Folder browser, right-click the file, select Source Control > Rename, and enter a new file name.

Delete file from local repository and retain a copy in working folder

In the Current Folder browser, right-click the file and select Source Control > Delete from Git. When the file is marked for deletion from source control, the symbol changes to Deleted (). The file is removed from the repository at the next commit.

Delete file from local repository and from working folder

In the Current Folder browser, right-click the file and select Source Control > Delete from Git and disk. The file disappears from the Current Folder browser and is immediately deleted from your working folder. The file is removed from the repository at the next commit.

Revert changes to file in local repository

In the Current Folder browser, right-click the file and select Source Control > Revert Local Changes.

Revert local changes to all files in local repository

In the Current Folder browser, right-click the white space and select Source Control > Branches. In the Branches dialog box, click Revert to Head.

Revert file to specified revision

In the Current Folder browser, right-click the file and select Revert using Git. Then, select a revision and click the Revert button. If you revert a file to an earlier revision and then make changes, you cannot commit the file until you resolve the conflict with the repository history.

Create Local Git Repository

If you want to add version control to your files without sharing with another user, you can create a local Git repository and working folder on your system without linking it to a remote repository.

To create a local Git repository and working folder:

  1. In the Current Folder browser, right-click the white space and select Source Control > Manage Files. MATLAB opens the Manage Files Using Source Control dialog box.

  2. Set the Source control integration option to Git.

  3. Click the Change button next to the Repository path field. MATLAB opens the Select a Repository dialog box.

  4. Click the Create a Git repository on disk button.

  5. Select the folder in which to create and store the local repository and click Select Folder. The selected folder must be empty.

  6. Click the Validate button to validate the repository path. If the path is valid, click the OK button to return to the Manage Files Using Source Control dialog box.

  7. Enter the path of the working folder in which to store your files in the Sandbox field. The specified folder must be empty.

  8. Click the Retrieve button.

After creating a local repository and working folder, to change the path of the local repository, right-click in the working folder, select Source Control > Remote, and specify the new path.

To use a Git server for the repository on your local system, you can use a Git server hosting solution or set up your own Apache® Git server.

Note

In a production environment, do not rely on remote repositories via the file system using the file:/// protocol. The file protocol is not safe. Concurrent access might corrupt repositories.

Store Uncommitted Changes Using Git Stashes

To store modified files for later use without committing them, create a Git stash. You also can use a stash to move changes to files easily to a new branch.

To create a stash, in the Current Folder browser, right-click the white space in your working folder and select Source Control > Stashes. Then, click the New Stash button.

To view modified files in a stash, in the Current Folder browser, right-click the white space and select Source Control > Stashes. In the Available Stashes section, select a stash and then right-click a modified file to view the changes or save a copy.

To apply the stash to your current branch and then delete the stash, click Pop. To apply the stash and keep it, click Apply.

To delete the stash, click Drop.

See Also

Functions

Related Topics

External Websites