이 페이지는 기계 번역을 사용하여 번역되었습니다. 영어 원문을 보려면 여기를 클릭하십시오.
실시간 이미지 수집 중 병의 충전량 확인
R2026b이 예제는 캘리퍼 툴을 사용하여 실시간 이미지 수집 중에 병의 충전량에서 이상 현상을 감지하는 방법을 보여줍니다.
이 예제는 다음과 같은 워크플로를 따릅니다:
카메라에 연결하고, 설정을 조정한 다음, 기준 이미지를 촬영하십시오.
참조 이미지 또는 이미지 정렬에서 템플릿 영역을 선택하고, 예시 Perform Metrology Edge Measurements and Alignment (Visual Inspection Toolbox)와 같이 예상되는 채우기 선을 찾으십시오.
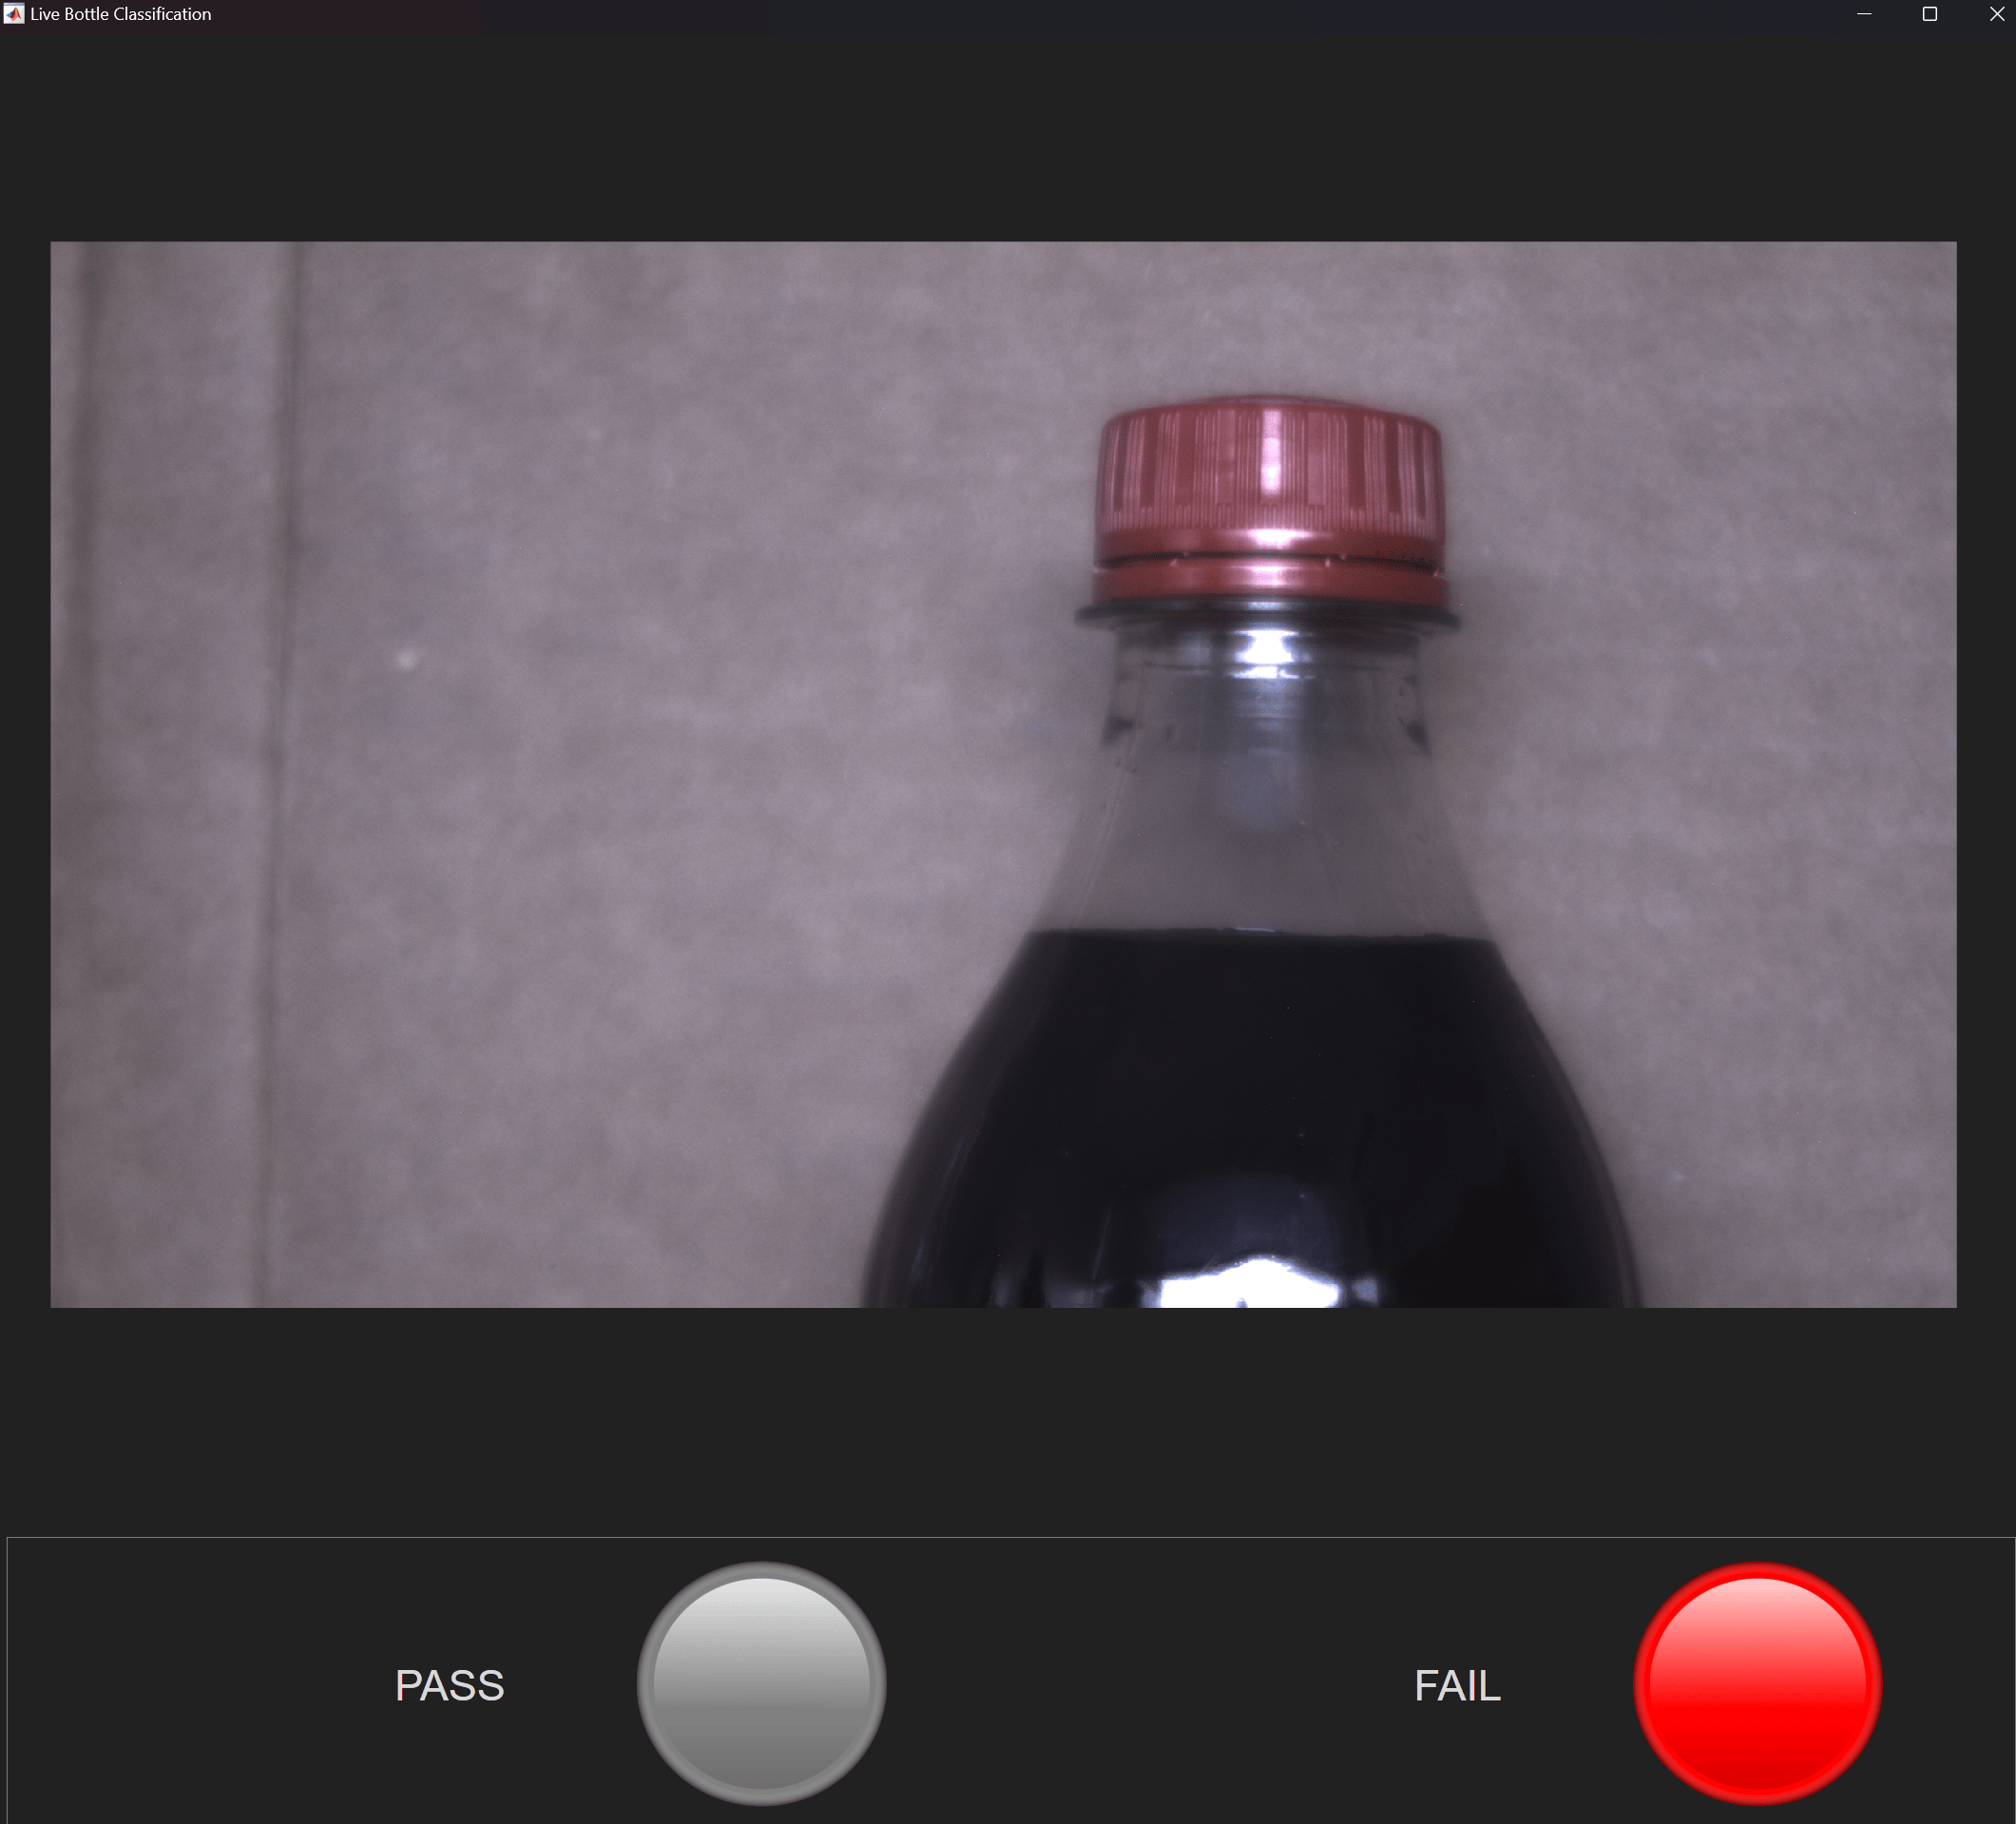
병의 실시간 이미지를 촬영하여 알고리즘에 전달함으로써, 충전량이 적절한지 판단합니다. 실시간 이미지 미리보기 화면에는 검사 대상 병이 통과했는지 실패했는지를 나타내는 녹색 및 빨간색 표시등이 표시됩니다.
선택적으로 MATLAB® Compiler™를 사용하여 훈련된 이상 감지 모델과 실시간 이미지 수집 기능을 배포할 수 있습니다. 스크립트가 독립 실행형 파일로 배포된 경우, MATLAB 라이선스가 없는 어떤 컴퓨터에서든 실행할 수 있습니다.
이 예제에서는 USB3 Vision 카메라를 사용하여 실시간 이미지를 전송합니다. 하지만 Image Acquisition Toolbox의 하드웨어 지원에 포함된 지원되는 모든 기기에서 이 예제를 실행할 수 있습니다.
이 예제를 실행하려면 다음 애드온이 필요합니다.
Image Acquisition Toolbox
GenICam™ 인터페이스용 Image Acquisition Toolbox 지원 패키지
Visual Inspection Toolbox™
카메라에 연결하고 videoinput 속성 설정하기
gentl 어댑터를 사용하여 videoinput 객체를 생성하여 카메라에 연결합니다. 이 예제에서는 Allied Vision Alvium USB3 Vision 카메라에서 이미지를 수집하기 위해 첫 번째 장치와 BGR8 픽셀 형식을 선택합니다. imaqhwinfo를 통해 사용 가능한 모든 기기를 확인할 수 있습니다.
v = videoinput("gentl",1,"BGR8");
ReturnedColorspace 속성을 "rgb"로 설정하십시오.
v.ReturnedColorspace = "rgb";해당 애플리케이션에 가장 적합한 ROIPosition를 구성하십시오.
v.ROIPosition = [0 0 2448 1370]; % [XOffset, YOffset, width, height]장치별 속성 구성
videosource 객체를 가져옵니다.
src = getselectedsource(v);
ROIPosition에 지정된 높이를 사용하여 AutoModeRegionHeight 속성을 설정합니다.
vidRes = v.ROIPosition;
src.AutoModeRegionHeight = vidRes(4);
카메라 노출 속성을 지정합니다. 이러한 속성의 값은 사용 가능한 광원 및 주변 조도와 같은 요인에 따라 달라집니다.
src.ExposureAutoMax = 8.489939e+05;
src.ExposureAutoMin = 3.670500e+01;
src.ExposureTime = 4.327557e+04;
검사할 데이터 준비하기
이 함수는 병의 충전량을 확인합니다. 이 함수가 어떻게 만들어졌는지 알아보려면 Perform Metrology Edge Measurements and Alignment (Visual Inspection Toolbox) 예제를 참조하십시오.
function TF = isFillLineDistanceInRange(capTemplate,templatePos,inspectionImage,referenceMeasurementPos,expectedDistance)
    % Setting tolerance threshold to 3%
    threshold = 0.03;

    % Align bottle in the inspection image with respect to reference image.
    tform = referenceImageToInspectionImageMapping(capTemplate,templatePos,inspectionImage);
    equivalentPos = transformPointsForward(tform,referenceMeasurementPos);

    % Measure distance from bottle cap to the fill level.
    measurementData = caliper(inspectionImage,equivalentPos,MeasurementMode="single-edge",...
        GradientThreshold = 0.01,EdgeTransition="both");

    % No bottles detected scenario.
    if isempty(measurementData.Distance)
        TF = false;
        return
    end

    % First edge to the last edge distance.
    measuredDist = measurementData.Distance(end) - measurementData.Distance(1);

    % Calculate if the bottle in the image is good or anomaly.
    TF = abs(measuredDist-expectedDistance) < threshold * expectedDistance;

    % The overall logic necessary to form a geometric transformation that aligns points
    % in the reference image with points in an inspection image is
    % summarized with the following function.
    function tform = referenceImageToInspectionImageMapping(capTemplate,templatePos,inspectionImage)
        tform = imregcorr(capTemplate,inspectionImage,"translation");
        tform.A(1:2,3) = tform.A(1:2,3) - templatePos(1:2)' + 1;
    end
end
다음 단계를 따라 검사 함수를 준비하십시오.
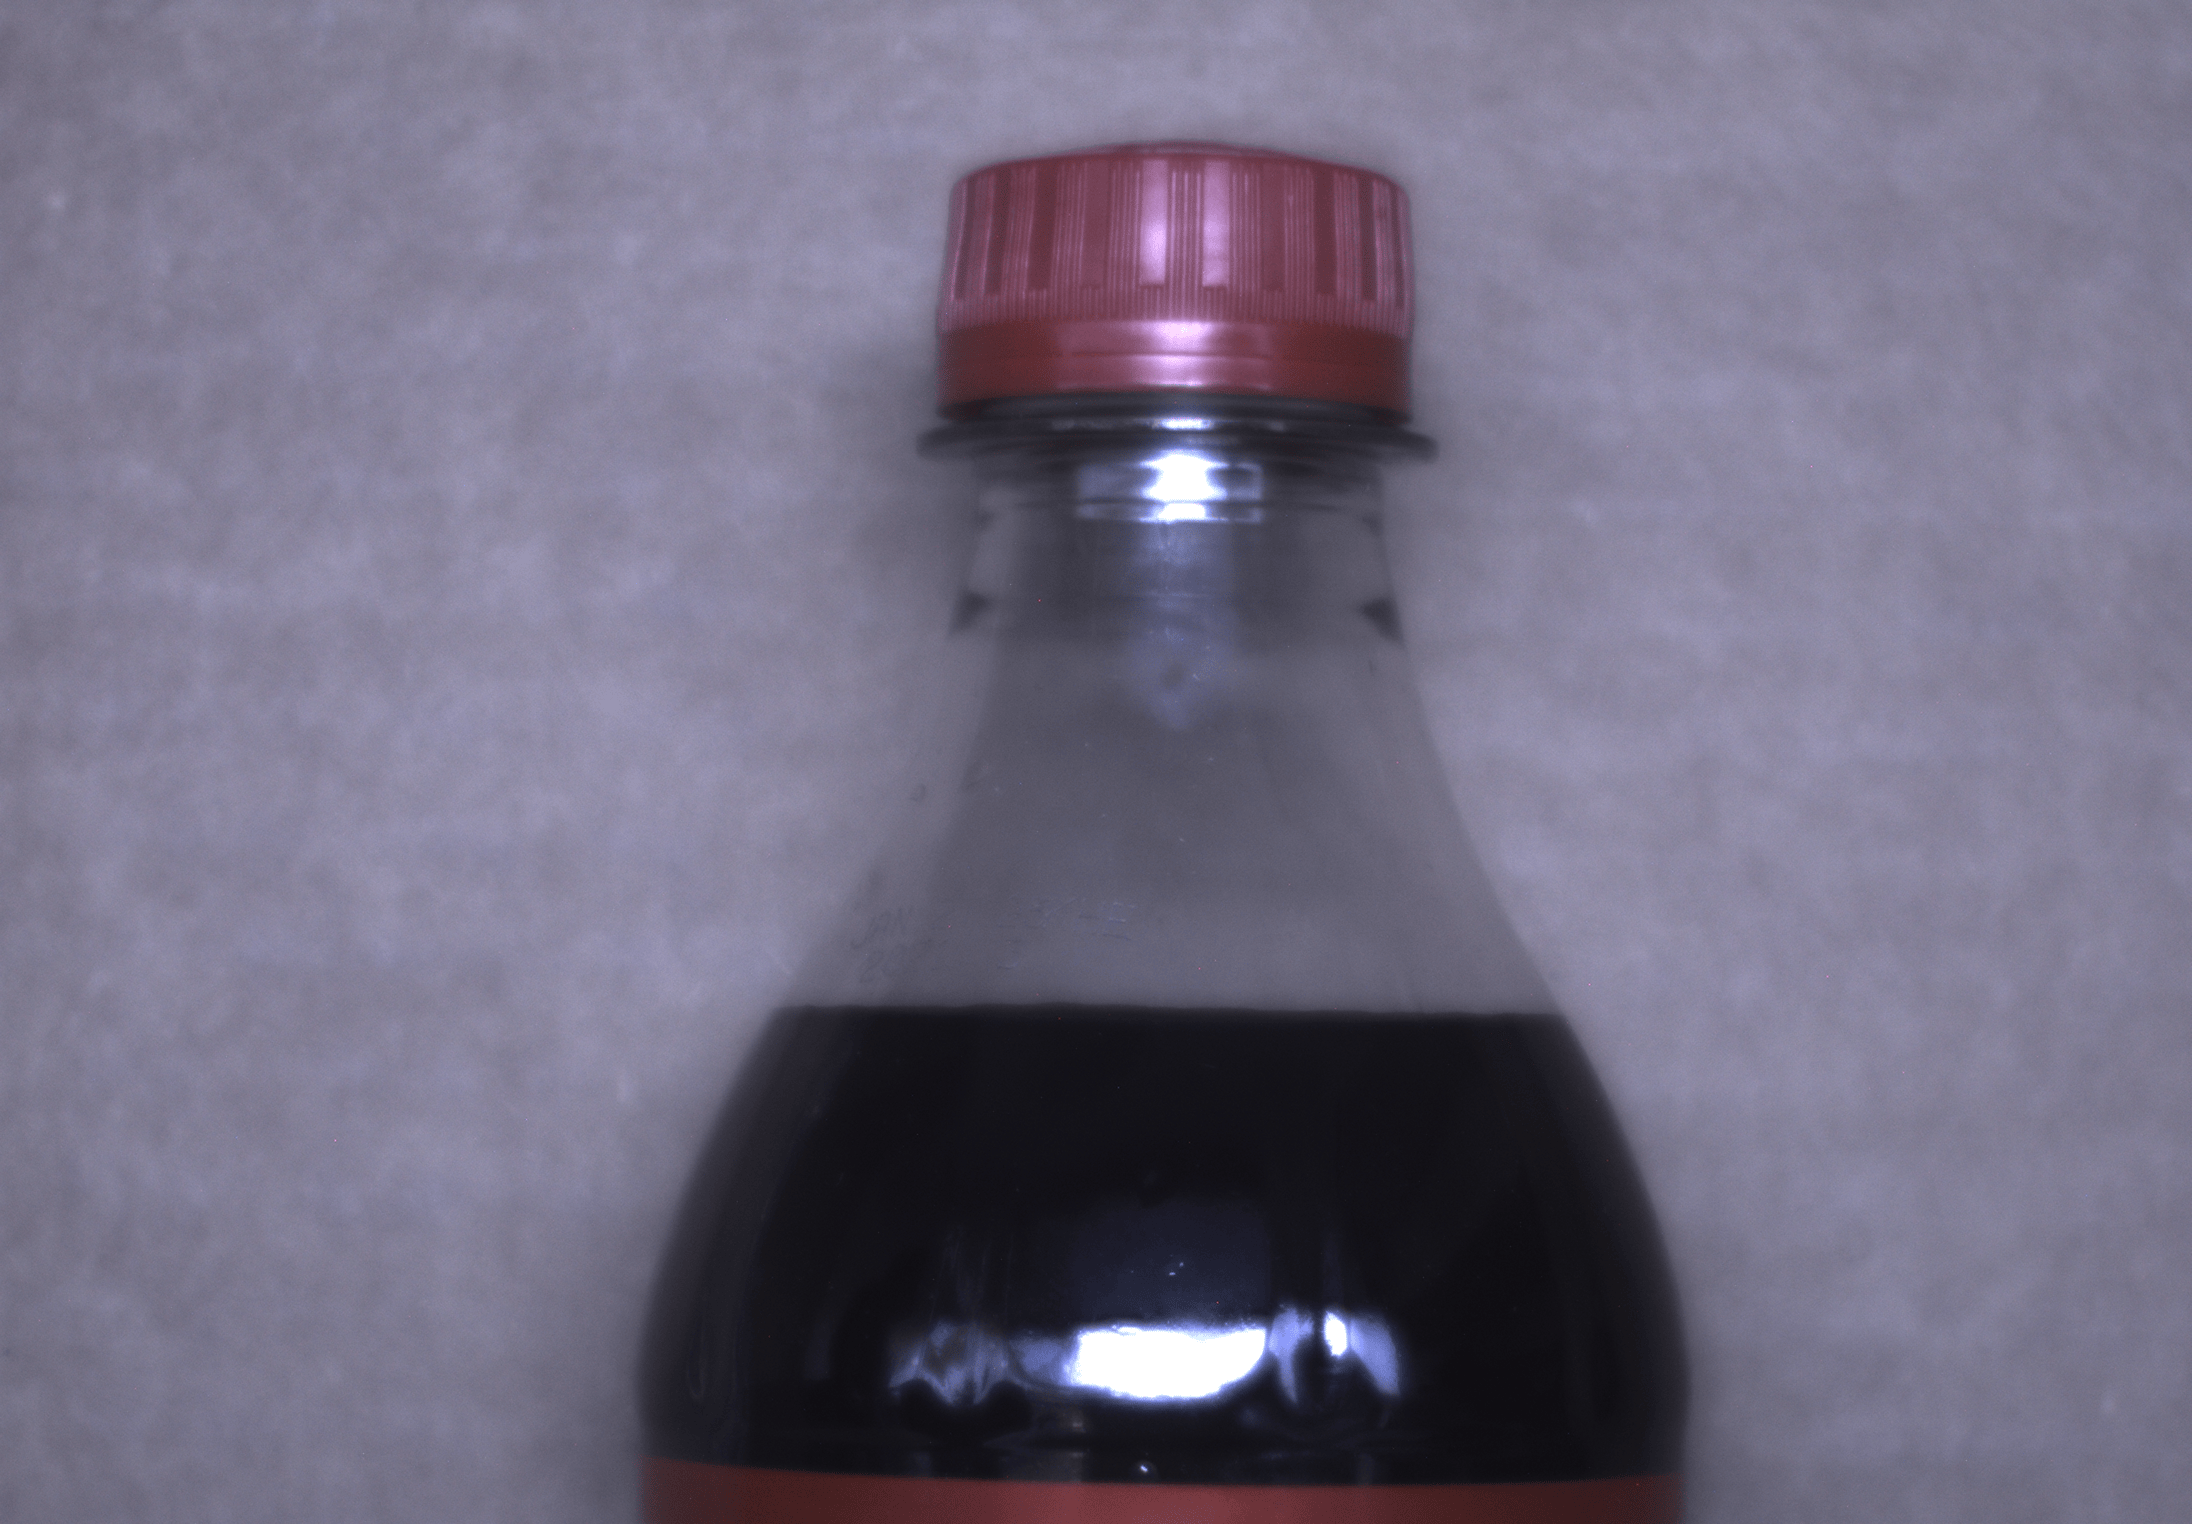
참조 이미지를 수집하십시오.
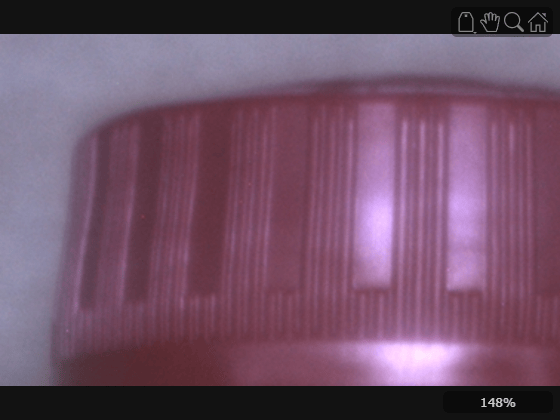
이미지 정렬을 위해 참조 이미지에서 템플릿 영역을 선택하십시오.
uicaliper를 사용하여 예상되는 병 채움 거리를 구하십시오.
참조 이미지 수집하기
goodImage = getsnapshot(v);
imageshow(goodImage);
이미지 정렬을 위해 참조 이미지에서 템플릿 영역 선택하기
병 검사를 위해 병 뚜껑을 템플릿 영역으로 선택하십시오. 이는 검사 이미지에 있는 병들을 기준 이미지와 정렬하는 데 사용되며, 알고리즘이 새로운 이미지에 캘리퍼를 올바르게 적용할 수 있도록 돕습니다.
templatePos = [902 114 377 237];
capTemplate = imcrop(goodImage,templatePos);
imageshow(capTemplate);
uicaliper를 사용하여 예상 병 채움 거리 구하기
hIm = imageshow(goodImage);
referenceMeasurementPos = [1173.2, 106.7; 1167.5 1057.8];
hCal = uicaliper(hIm,Position=referenceMeasurementPos,MeasurementMode="single-edge",...
    GradientThreshold = 0.02,EdgeTransition="both");
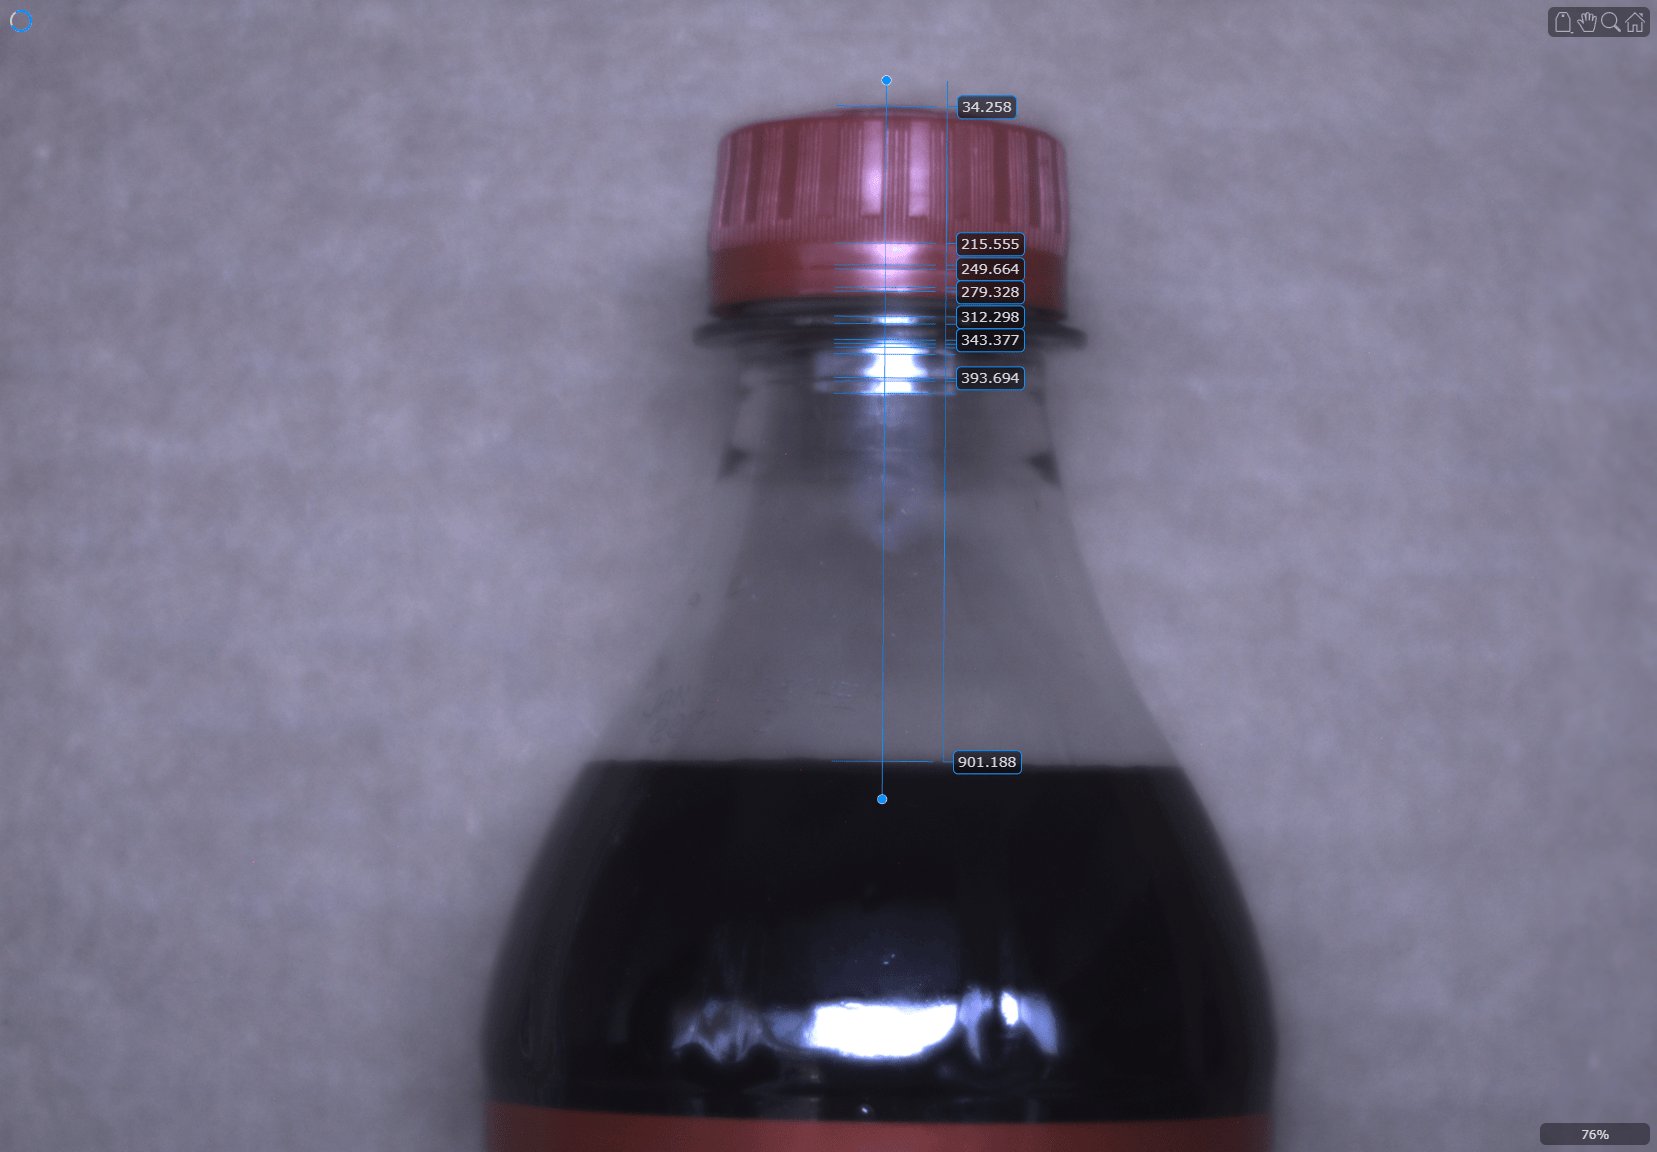
expectedCapToFillLineDistance = hCal.Distance(end) - hCal.Distance(1);
병의 실시간 검사를 위한 사용자 지정 미리보기 생성
사용자 지정 미리 보기를 위한 Figure 창을 만듭니다.
hFig = uifigure("Toolbar","none",...
       "Menubar", "none",...
       "NumberTitle","Off",...
       "AutoResizeChildren","off",...
       "Name","Live Bottle Classification");
용도에 따라 Figure의 위치를 설정하십시오.
hFig.Position = [0 0 1500 1500];
전체 화면을 구성하기 위해 메인 그리드 레이아웃을 만듭니다.
hGrid1 = uigridlayout(hFig);
hGrid1.ColumnWidth = {"1x"};
hGrid1.RowHeight = {"5x","1x"};
패널을 생성합니다.
hPanel = uipanel(hGrid1);
hPanel.Layout.Row = 2;
hPanel.Layout.Column = 1;
hGrid2라는 이름의 또 다른 그리드 레이아웃을 생성하여, 통과 및 실패 표시 패널의 배경으로 사용합니다.
hGrid2 = uigridlayout(hPanel);
hGrid2.ColumnWidth = {"1x","1x","1x","1x"};
hGrid2.RowHeight = {"1x"};
통과 레이블을 생성합니다.
goodBottleLabel = uilabel(hGrid2);
goodBottleLabel.HorizontalAlignment = "right";
goodBottleLabel.Layout.Row = 1;
goodBottleLabel.Layout.Column = 1;
goodBottleLabel.Text = "PASS";
goodBottleLabel.FontSize = 30;
uilamp를 생성하여 병 통과 신호를 보냅니다.
goodBottle = uilamp(hGrid2);
goodBottle.Layout.Row = 1;
goodBottle.Layout.Column = 2;
goodBottle.Color = [0.502 0.502 0.502];
실패 레이블을 생성합니다.
badBottleLabel = uilabel(hGrid2);
badBottleLabel.HorizontalAlignment = "right";
badBottleLabel.Layout.Row = 1;
badBottleLabel.Layout.Column = 3;
badBottleLabel.Text = "FAIL";
badBottleLabel.FontSize = 30;
병 실패 발생을 알리기 위해 uilamp를 생성합니다.
badBottle = uilamp(hGrid2);
badBottle.Layout.Row = 1;
badBottle.Layout.Column = 4;
badBottle.Color = [0.502 0.502 0.502];
비디오 미리보기 데이터를 표시할 image 객체를 생성합니다. 이미지 객체의 크기는 비디오 프레임의 크기와 일치해야 합니다.
numBands = v.NumberOfBands;
hAxis = uiaxes(hGrid1);
hAxis.Layout.Row = 1;
hAxis.Layout.Column = 1;
hImage = image(zeros(vidRes(4), vidRes(3), numBands), Parent=hAxis);
axis(hAxis,"image");
사용자 지정 미리보기 콜백 함수를 생성합니다. 이 함수는 각 프레임을 처리하여 병이 적정 수준까지 채워져 있는지 여부를 판별합니다. 이 함수는 isFillLineDistanceInRange 함수를 사용하여 통과한 병과 실패한 병을 구분합니다.
function mypreview_fcn(obj,event,hImage)
    % Information needed for isFillLineDistanceInRange function.
    persistent capTemplate
    persistent templatePos
    persistent referenceMeasurementPos
    persistent expectedCapToFillLineDistance

    if isempty(capTemplate)
        capTemplate =  getappdata(hImage,"CapTemplate");
    end

    if isempty(templatePos)
        templatePos =  getappdata(hImage,"TemplatePos");
    end

    if isempty(referenceMeasurementPos)
        referenceMeasurementPos =  getappdata(hImage,"ReferenceMeasurementPos");
    end

    if isempty(expectedCapToFillLineDistance)
        expectedCapToFillLineDistance =  getappdata(hImage,"ExpectedCapToFillLineDistance");
    end

    % Handle to bottle pass lamp.
    goodBottle =  getappdata(hImage,"GoodBottle");
    % Handle to bottle fail lamp.
    badBottle =  getappdata(hImage,"BadBottle");

    % Image to inspect and then preview.
    inspectionImage = event.Data;

    % Inspect the incoming image for fill line distance
    isGood = isFillLineDistanceInRange(capTemplate,templatePos,inspectionImage,referenceMeasurementPos,expectedCapToFillLineDistance);

    if isGood
        % Set bottle fail lamp to gray
        badBottle.Color = [0.502, 0.502, 0.502];
        % Set bottle pass lamp to green
        goodBottle.Color = [0.00,1.00,0.00];
    else
        % Set bottle pass lamp to gray
        goodBottle.Color = [0.502,0.502,0.502];
        % Set bottle fail lamp to red
        badBottle.Color = [1.00,0.00,0.00];
    end

    hImage.CData = inspectionImage;
end
사용자 지정 미리보기 콜백 함수를 설정합니다.
setappdata(hImage,"UpdatePreviewWindowFcn",@mypreview_fcn);사용자 지정 미리보기 함수에서 필요한 모든 데이터를 설정하십시오.
setappdata(hImage,"TemplatePos",templatePos);
setappdata(hImage,"CapTemplate",capTemplate);
setappdata(hImage,"ReferenceMeasurementPos",referenceMeasurementPos);
setappdata(hImage,"ExpectedCapToFillLineDistance",expectedCapToFillLineDistance);
setappdata(hImage,"GoodBottle",goodBottle);
setappdata(hImage,"BadBottle",badBottle);
미리보기를 시작하십시오.
preview(v,hImage);
다음 미리보기에서는 "통과" 및 "실패" 사례를 보여줍니다.
통과:
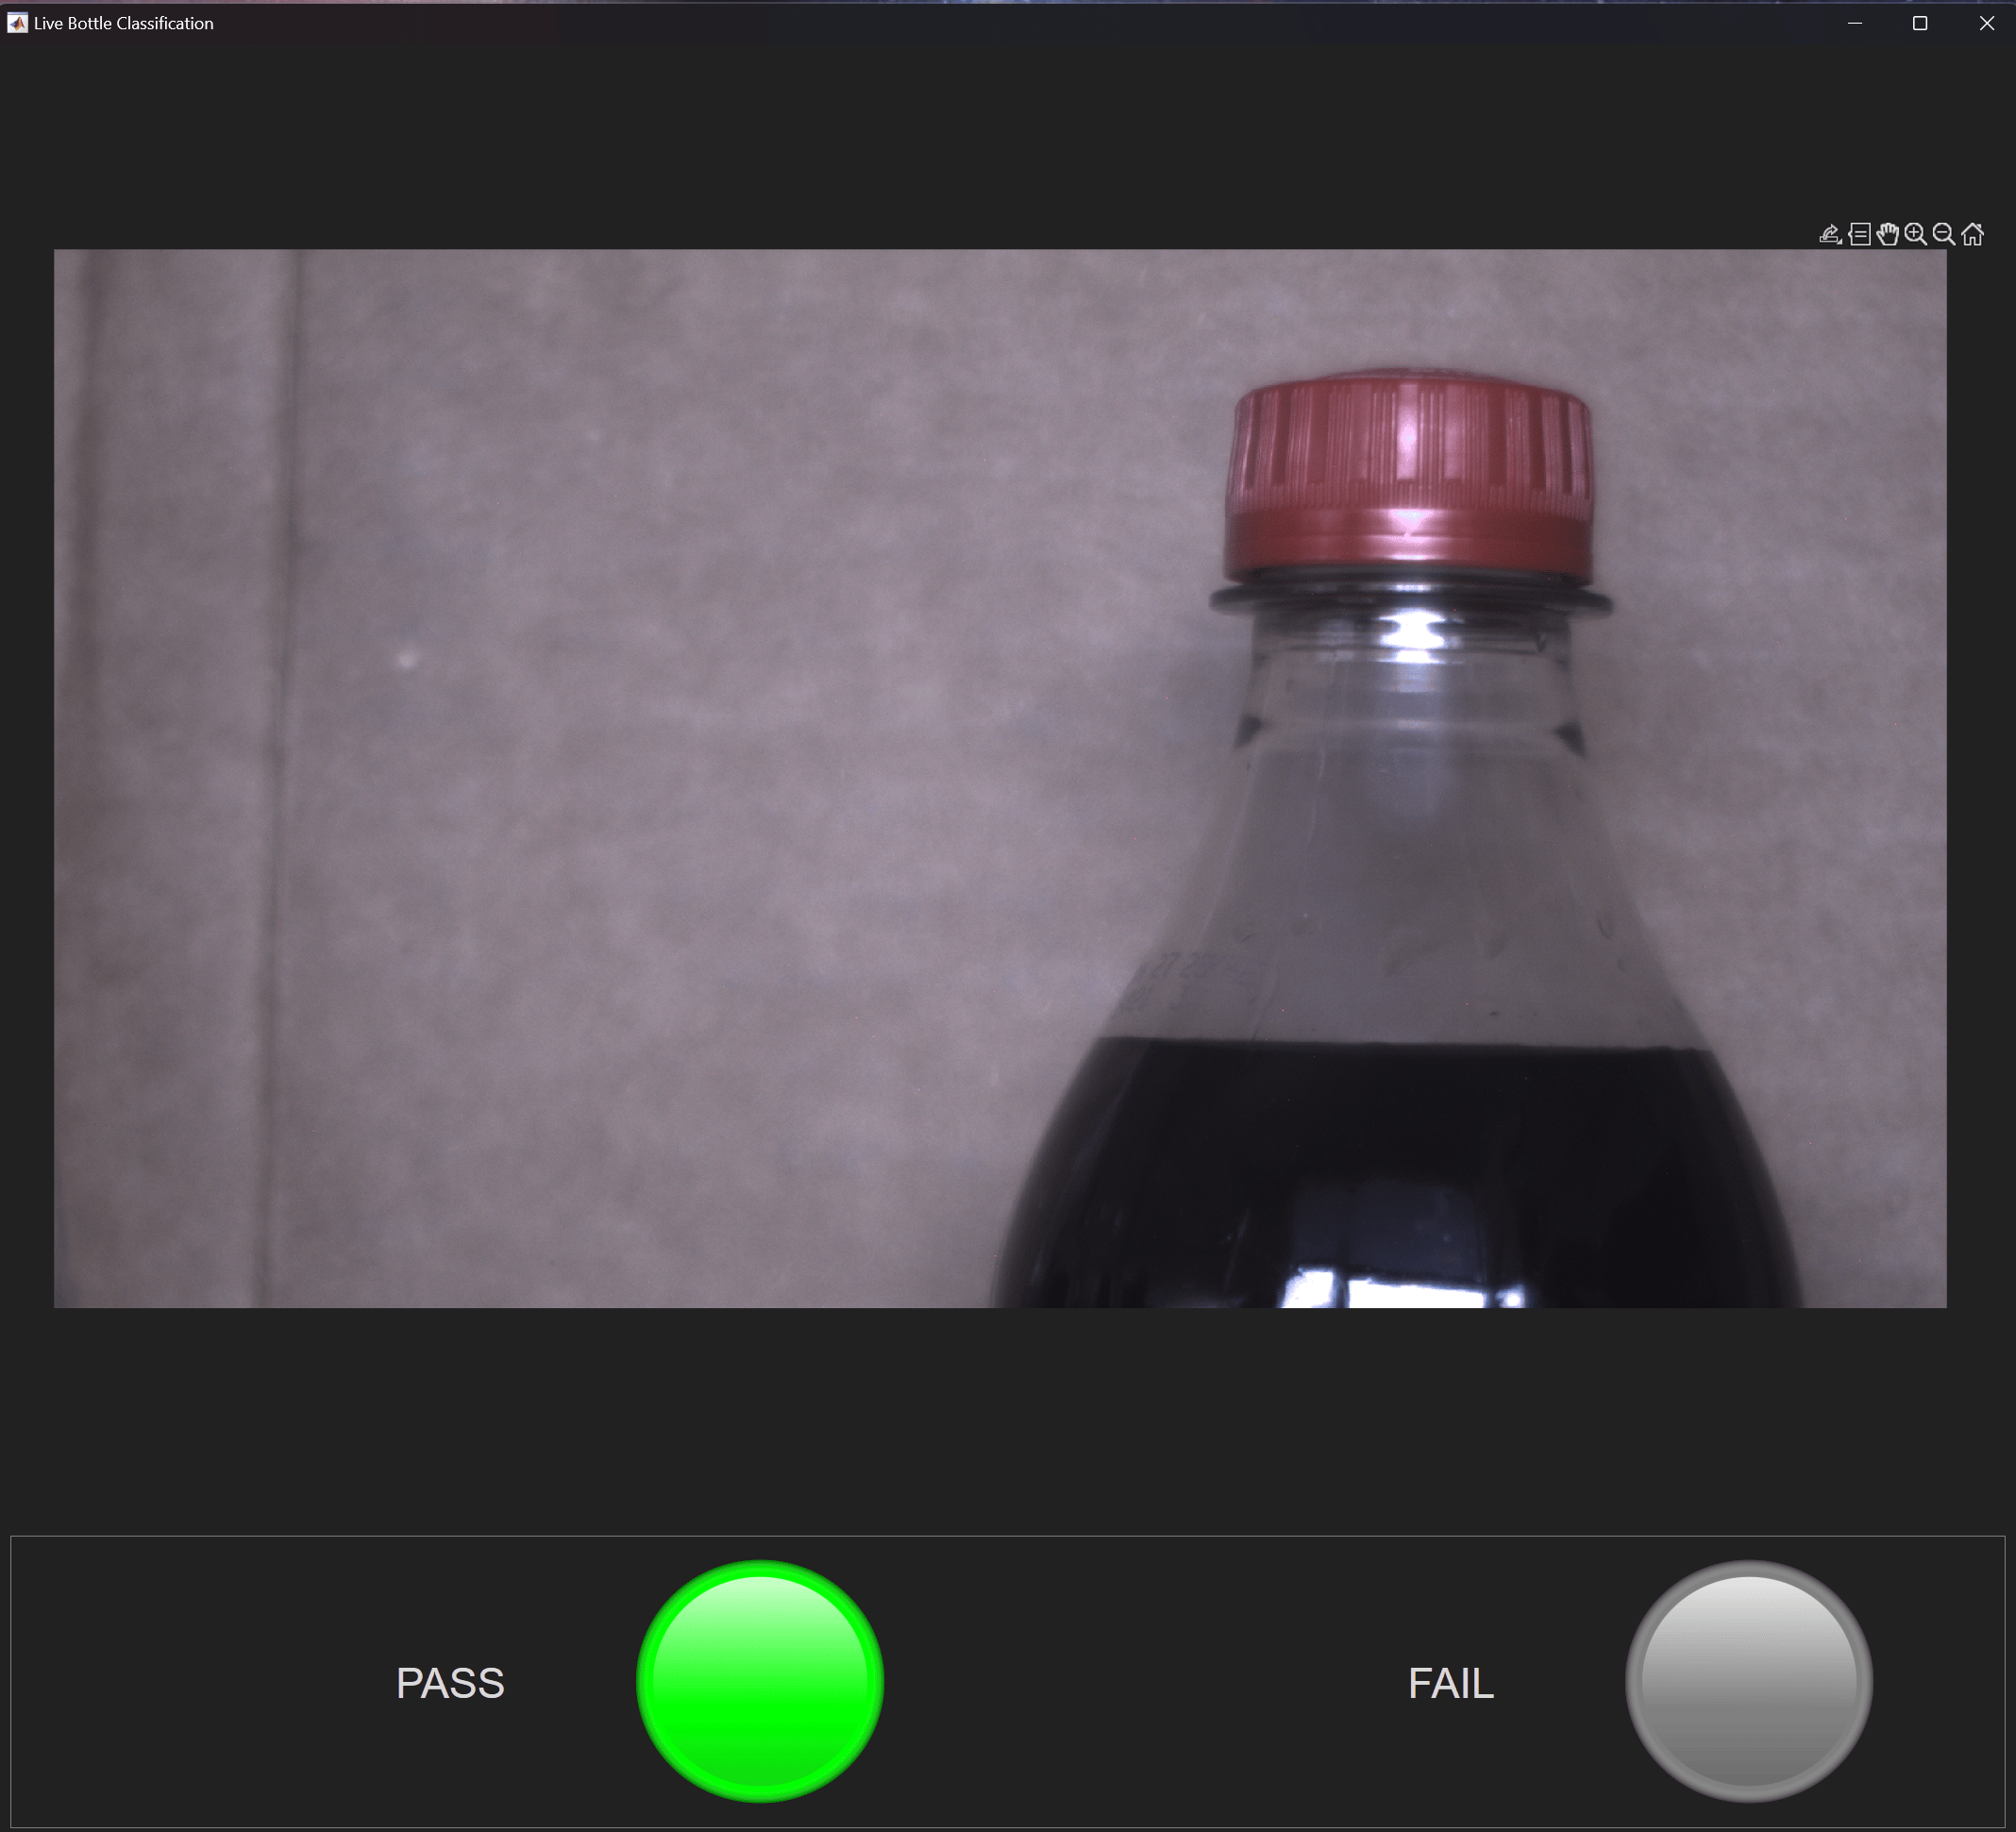
실패:
라이브 이미지 분류 기능을 독립형 애플리케이션으로 배포하기
독립 실행형 애플리케이션 컴파일러 (MATLAB Compiler) 앱을 사용하여 병의 실시간 이미지 분류 기능을 독립형 애플리케이션으로 배포할 수 있습니다. MATLAB Compiler에 대한 라이선스가 있어야 합니다. 독립형 애플리케이션을 생성하면, 별도의 MATLAB 라이선스 없이도 여러 대의 컴퓨터에 배포할 수 있습니다.
참고 항목
도움말 항목
- Perform Metrology Edge Measurements and Alignment (Visual Inspection Toolbox)

