Import Custom C++ Class Using the Simulink Code Importer Wizard
Starting in R2024a, you can Use Simulink® Code Importer to import a custom C++ class into Simulink library.
In this workflow, the source file and the header file are adder_cpp.cpp
and adder_cpp.h, respectively.
For
adder_cpp.h:
#ifndef _ADDER_CPP_
#define _ADDER_CPP_

class adder {
private:
    int int_state;
public:
    adder();
    adder(int init_value);
    int add_one(int increment);
    int get_val();
};

#endif /* _ADDER_CPP_ */
For
adder_cpp.cpp:
#include "adder_cpp.h"

/**********************************/
/**** Class method definitions ****/
/**********************************/

adder::adder()
{
    int_state = 0;
}

adder::adder(int init_value)
{
    int_state = init_value;
}

int adder::add_one(int increment)
{
    int_state += increment;
    return int_state;
}

int adder::get_val()
{
    return int_state;
}
To open the Code Importer Wizard, create an empty Simulink library where the
srcandincludefiles are located. To create a blank library, from the Simulink start page, select Blank Library and click Create Library. Optionally, save the library in the working folder.In the Simulink library toolstrip, on the Modeling tab, select Design > Code Importer.
On the Welcome page, click Start.
On the Settings page:
In the Library or model name field, specify a filename for the Simulink library. For this example, a new library
importclassis generated.In the Output folder field, specify the folder where you want to save this library.
Note
If you save the library with a name in step 1 of this workflow or open a saved library, the Library or model name and the Output folder fields are autopopulated with the library name and the location of the saved library file, respectively.
Optionally, select Add generated library to Simulink Library Browser to create an
sdlblocks.mfile. Thesdlblocks.mfile is used to add the generated library to a Simulink Library Browser. For more information, see Add Libraries to Library Browser and Quick Insert.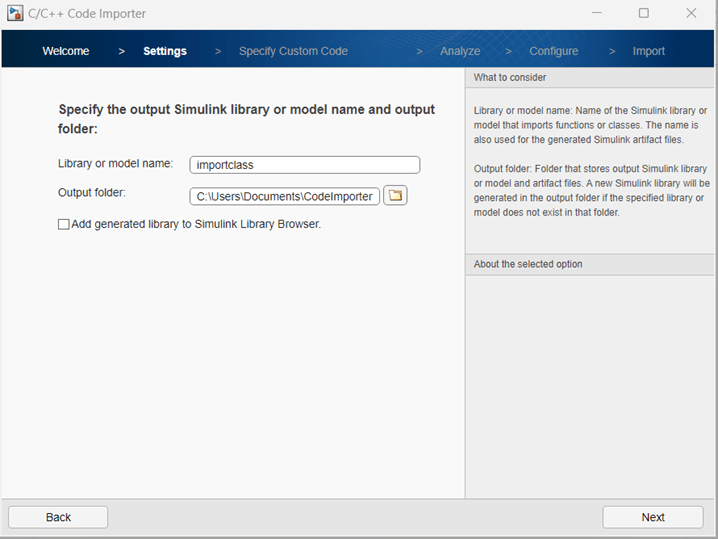
Click Next to continue.
On the Specify custom code page:
For Language, select
C++.For Interface headers, specify the required header files. For this example, the header file is
adder_cpp.h.For Source files, specify the required source files. For this example, the header file is
adder_cpp.cpp.For Include directories, specify the required directories. For this example, this field contains the address of the folder where the header file is located.
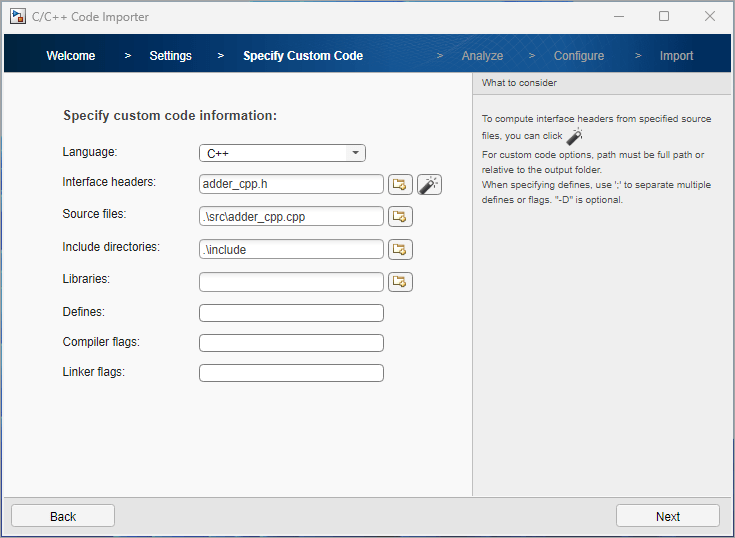
Click Next to continue.
On the Analyze page, click Next. Simulink Code Importer analyzes the custom code for classes and their dependencies.
On the Configure page, select the classes to import. For this example, the class is
adder.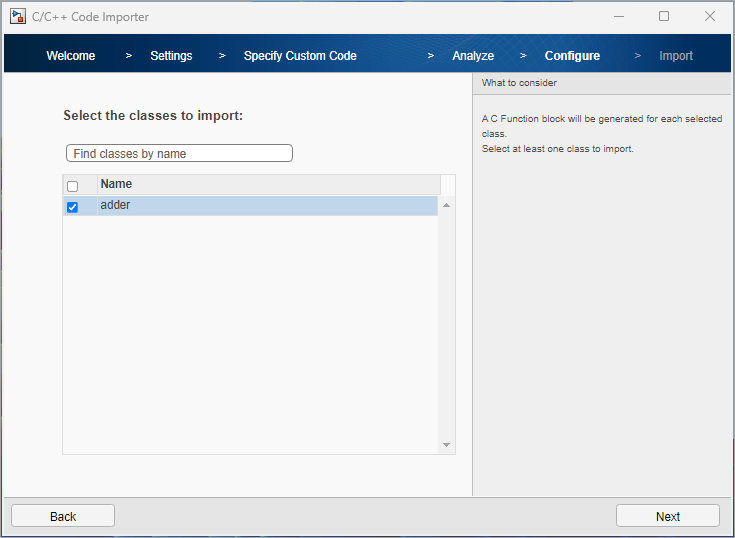
Click Next to continue.
On the next page, click the Define Interface button and configure the Simulink Interface for the
adderclass. Set Constructor for class instantiation toadder(void);and select Methods for output code toint32_T add_one(int32_T increment).Optionally, specify Initialization method and Cleanup method.
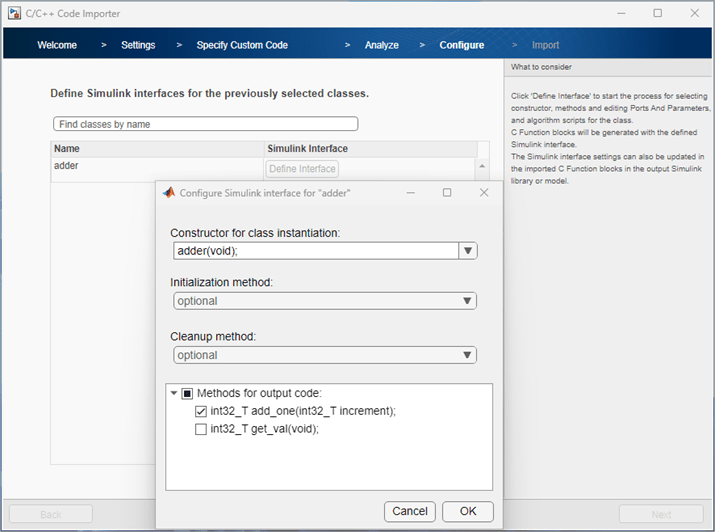
Click OK to continue.
Check and specify the following parameters, which integrates the custom C++ class into Simulink.
Ports and Parameters
Output, Initialize Conditions and Terminate code for simulation and code generation
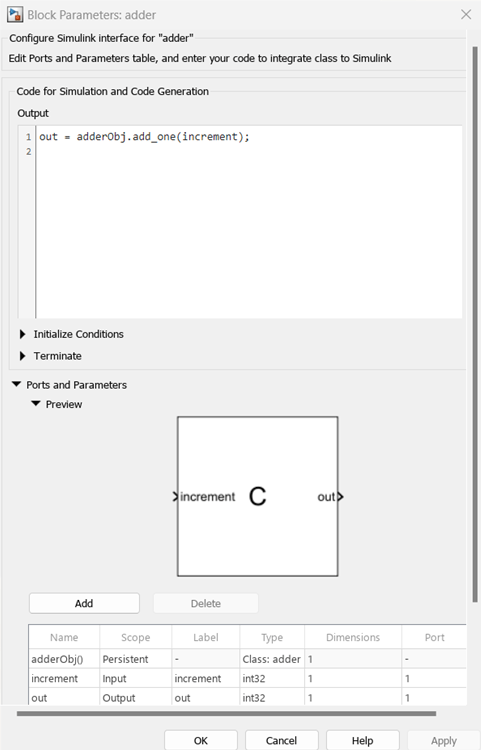
Click OK to continue.
In the Define Simulink interfaces for the previously selected classes page, click Modify Interface to modify the interface parameters.
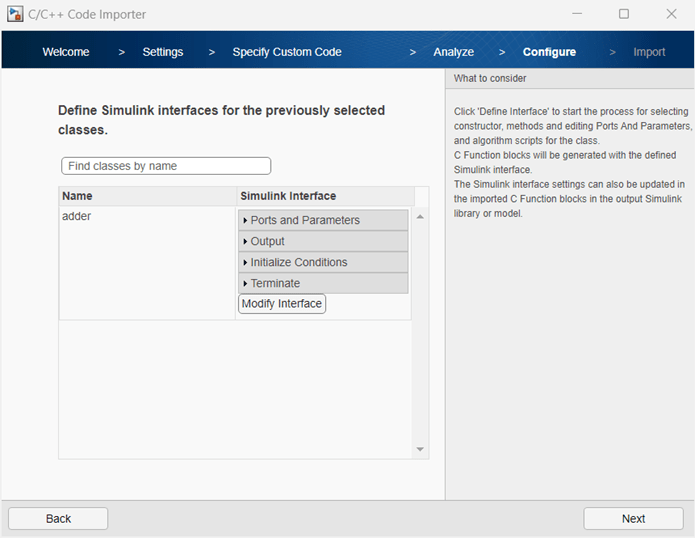
Click Next to continue.
On the Import page, check the specifications of the generated library and click Next to continue.
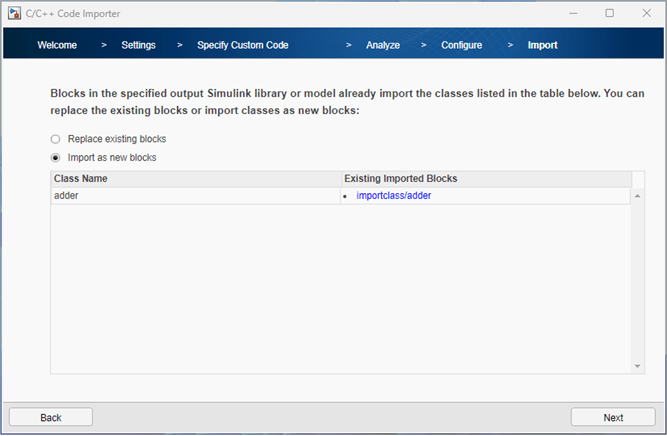
On this page, the wizard provides two options:
Note
These options are not available if you are importing this class (
adder) to the library generated in the previous step for the first time. This is available only if you have imported this class (adder) to the library generated in the previous step at least once before.Replace existing blocks— Select this option to replace the existing blocks with the new C Function blocks for the selected custom C++ class.
Import as new blocks— Select this option to preserve the existing blocks and create a new C Function block for the selected custom C++ class.
To view the existing blocks, click the block path address mentioned in Existing Imported Blocks column.
For this example, select Import as new blocks, then click Next to continue.
This option is available only if you have a Simulink Test™ license. To test the imported class using Simulink Test Manager, select Automatically create test harness for all imported functions or classes. Each block in the created library is attached to an internal test harness.
For this example, select Skip.

Click Next to continue.
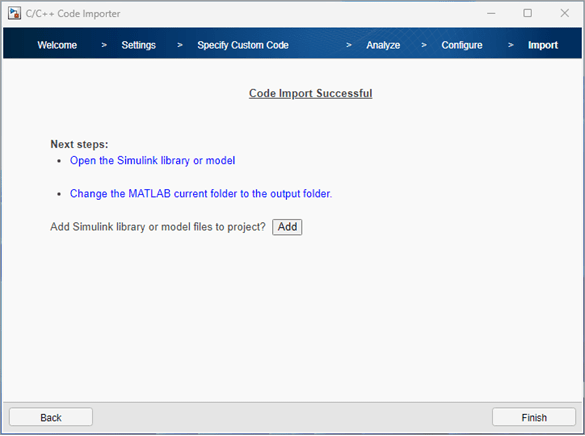
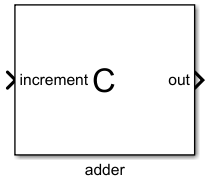
After the code imports, the wizard creates a custom C Function block that imports the custom class. You can view this block on the Simulink canvas.
If you have an existing project file (PRJ file), you can select Add, select the desired project file, and add the generated file to that project.
Click Finish to close the wizard. Select whether to save the current import settings to a JSON file. You can use this file to load the Code Importer wizard with the current import settings.