Use Octave Filter Bank to Create Flanging Chorus Effect for Guitar Layers (Overdubs)
Examine the Octave Filter Bank block in a Simulink® model. Apply octave band compression and reverb to create a flanging chorus effect on the guitar signal. Use the processed signal as an overdub layer to enhance your guitar recordings.
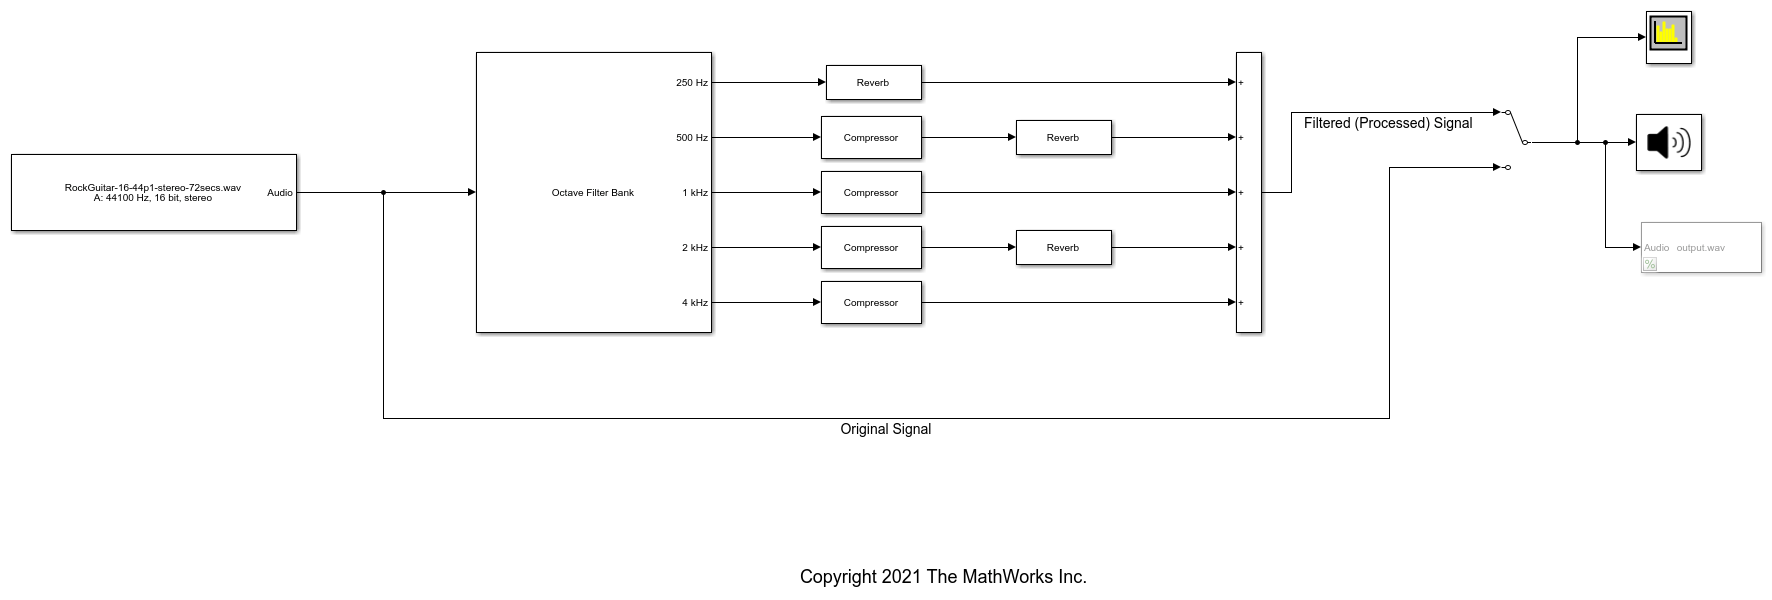
Using the Octave Filter Bank block allows you to separate the audio signal into multiple frequency bands and process each band individually. In this model example, you split a guitar recording into 5 octave bands and apply compression and reverb to each band separately to create a flanging chorus overdub layer for your recording project.
1. Double-click the Octave Filter Bank block to view its parameters. Notice the Bands as separate output ports box is checked. This creates a direct output on the block for each filter in the bank. The Octave ratio is also set to Base two (musical scale). To see the magnitude response of the filters in the bank, click the View Filter Response button.
2. Run the model.
3. Tune parameters on the Reverberator and Compressor blocks to hear the effects on your audio device and see the effect on the Spectrum Analyzer display. Switch between listening to the Original Signal and the Filtered (Processed) Signal by double-clicking the Manual Switch (Simulink) block.
4. This Simulink® model can be used to provide overdub guitar layers in your digital audio workstation (DAW) recording projects. Uncomment the To Multimedia File block to save your Filtered (Processed) Signal audio to a file. In your DAW session, pan the Original Signal to the left side of the stereo-field and pan the Filtered (Processed) Signal to the right side of the stereo-field. This creates a wide, lush stereo image and adds depth and warmth to your guitar track.
